Smart Gardening: Pruning and Training Backyard Apple and Pear Trees
DOWNLOADJanuary 16, 2024 - Diane Brown, Michigan State University Extension. Revised for Michigan from ‘Growing Apple Trees in Wisconsin' by Roper, Mahr and McManus, 2006. Revised by Barbara Gregerson and Derek Plotkowski, Michigan State University Extension
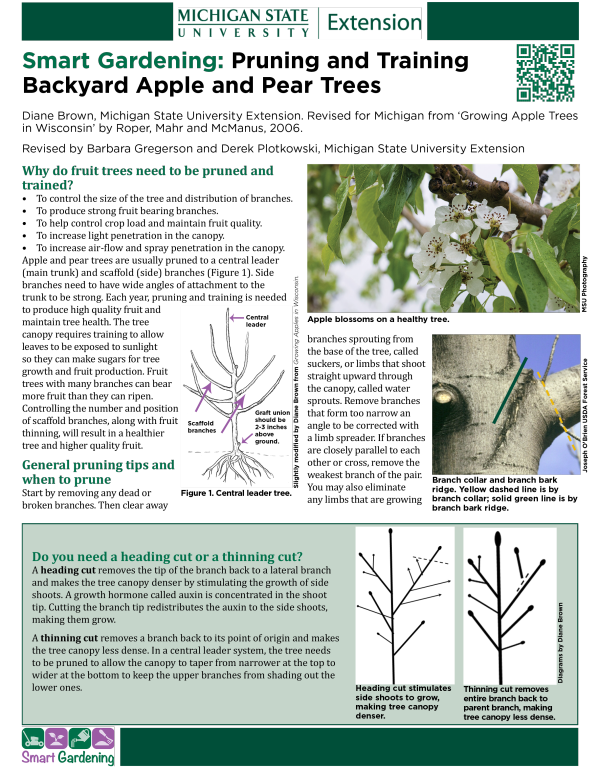
Why do fruit trees need to be pruned and trained?
- To control the size of the tree and distribution of branches.
- To produce strong fruit bearing branches.
- To help control crop load and maintain fruit quality.
- To increase light penetration in the canopy.
- To increase air-flow and spray penetration in the canopy.
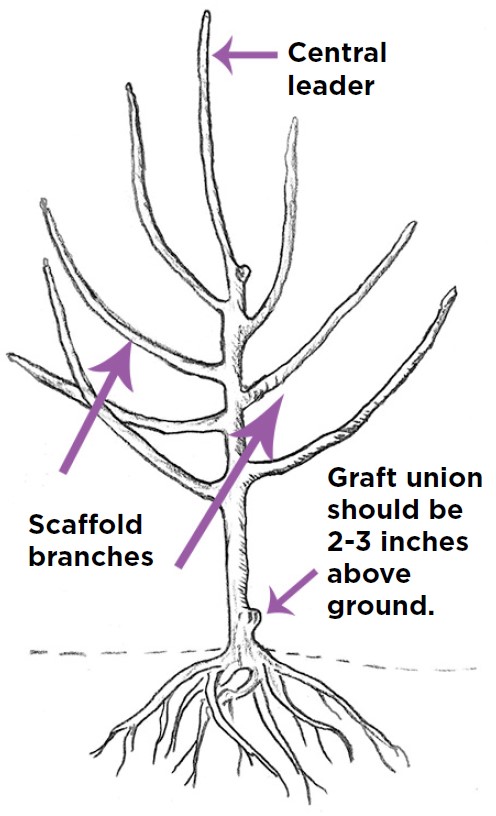
Apple and pear trees are usually pruned to a central leader (main trunk) and scaffold (side) branches (Figure 1). Side branches need to have wide angles of attachment to the trunk to be strong. Each year, pruning and training is needed to produce high quality fruit and maintain tree health. The tree canopy requires training to allow leaves to be exposed to sunlight so they can make sugars for tree growth and fruit production. Fruit trees with many branches can bear more fruit than they can ripen. Controlling the number and position of scaffold branches, along with fruit thinning, will result in a healthier tree and higher quality fruit.
General pruning tips and when to prune
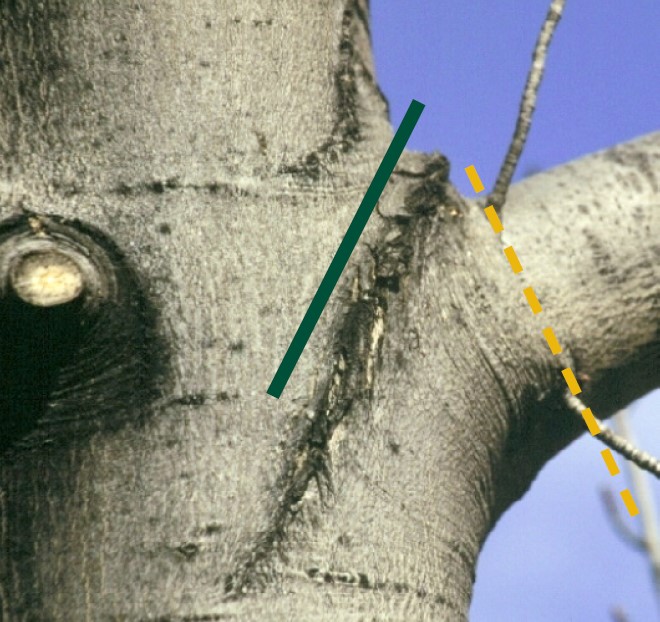
Start by removing any dead or broken branches. Then clear away branches sprouting from the base of the tree, called suckers, or limbs that shoot straight upward through the canopy, called water sprouts. Remove branches that form too narrow an angle to be corrected with a limb spreader. If branches are closely parallel to each other or cross, remove the weakest branch of the pair. You may also eliminate any limbs that are growing downward. Avoid leaving long stubs when pruning, but don’t cut too close to the remaining branch either. A cut into the branch bark ridge is too close (above). Ideally, the portion of branch left should be about 0.25-inch-long, just above the branch collar. Cuts made at this location will callus over quicker than those cut too close or with stubs left too long. Cutting limbs above the branch collar is of greater importance than the angle of the cut. Do not use tree paint, as it allows wounds to stay moist, making it more attractive to disease organisms and insects.
The best time of year to do major amounts of pruning is when the trees are dormant (January to early April). In the summer, remove water sprouts or suckers from the base if needed. Avoid pruning after late July as it can predispose trees to winter injury or delay dormancy.
Do you need a heading cut or a thinning cut?
A heading cut removes the tip of the branch back to a lateral branch and makes the tree canopy denser by stimulating the growth of side shoots. A growth hormone called auxin is concentrated in the shoot tip. Cutting the branch tip redistributes the auxin to the side shoots, making them grow.
A thinning cut removes a branch back to its point of origin and makes the tree canopy less dense. In a central leader system, the tree needs to be pruned to allow the canopy to taper from narrower at the top to wider at the bottom to keep the upper branches from shading out the lower ones.
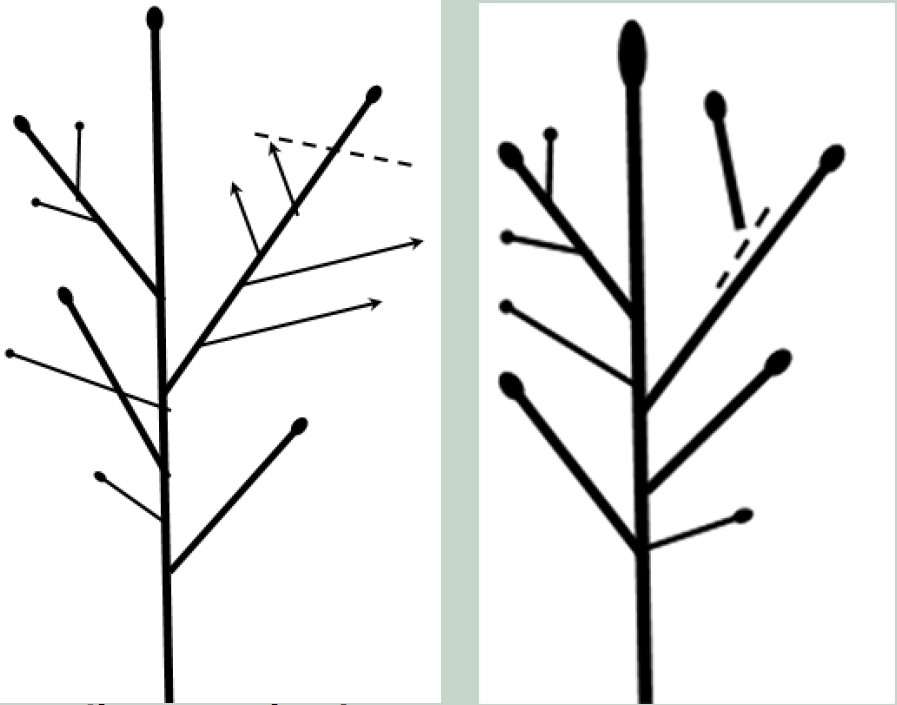
Pruning and training young trees
At planting time
If you start with an unbranched whip (single stem) tree, cut the top off (heading cut) leaving it 30-45 inches tall. Side branches will grow out below the cut the first year. You control the height of the new limbs by the height of the cut you make. If you start out with a branched tree, remove branches that are broken, damaged or poorly positioned.
First year spring
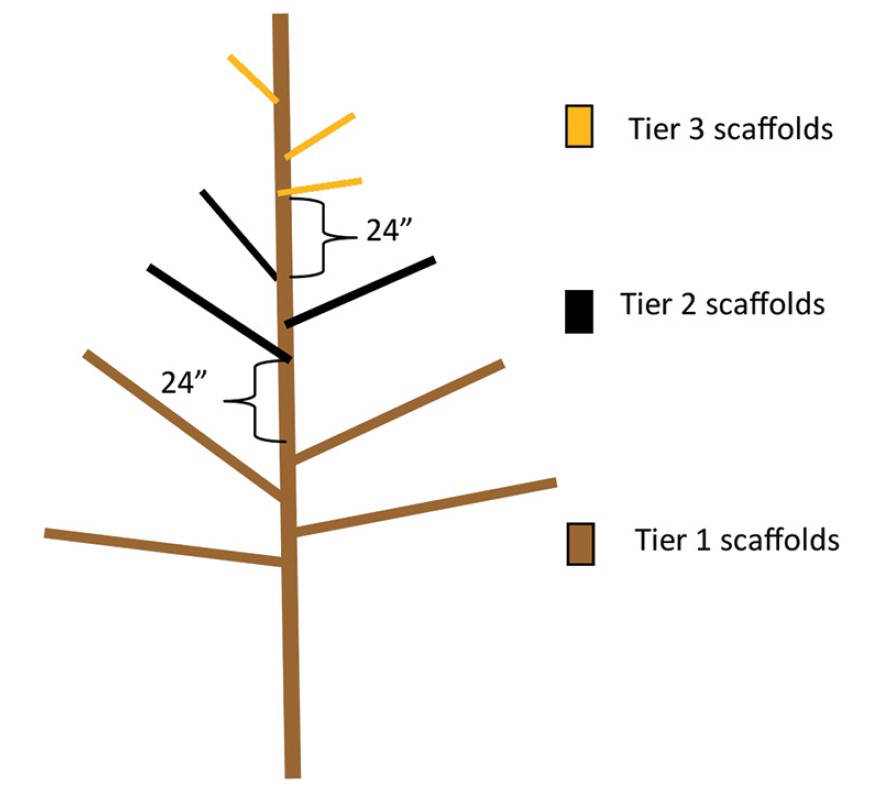
Choose four or five good branches for the lowest tier of scaffolds. The lowest branch should be 24-36 inches above ground. Select well-spaced branches within about 18 inches of the lower branch that are not directly opposite nor directly above one another. Remove other limbs that won’t become scaffolds.
If limb angles are too narrow, use limb spreaders to widen the angles. Remove any developing fruit in years one and two.
Second and third year spring
After two or three years, choose a second tier of scaffold limbs with wide crotch angles that are positioned at least 24 inches above the top branch of the lower tier. The 2-foot gap allows light to reach the lower part of the canopy. The upper branches must be kept shorter than the lower branches to prevent shading. The tree shape will roughly look like a Christmas tree. Dwarf trees need only two tiers of branches; semi-dwarf will need three. Repeat the process to make a third set of scaffolds (see diagram).
Subsequent years
The central leader needs to remain the tallest part of the tree. Prune back any side branches that are getting too tall to second year wood. Once the central leader reaches the desired height (8-10 ft. for dwarf, 12-16 ft. for semi-dwarf), maintain the height by cutting the leader back to a weak side branch.
Did you know - branch angle’s impact?
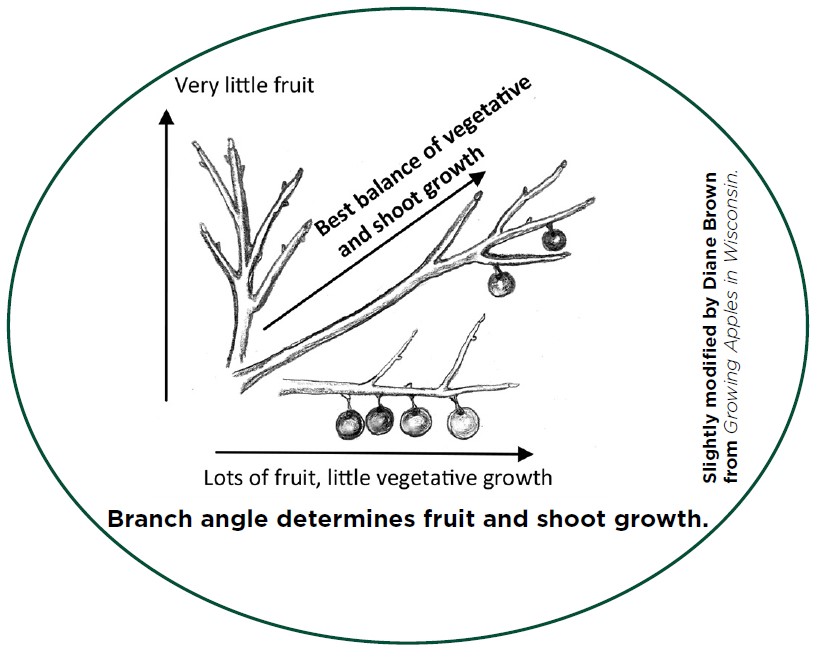
Research has shown the angle of branch growth determines how much fruit it will produce. A branch that grows straight up (vertical) produces mostly vegetative growth and very little fruit. Branches that grow straight out (horizontal) produce a lot of fruit but very little vegetative growth. The ideal branch angle for producing fruit is about 30 degrees above horizontal, creating a 60-degree crotch angle, which creates a balance of fruit growth and shoot growth. The easiest time for adjusting branch angle is when branches are 3-6 inches long. Clothespins or fishing weights can be used for this purpose.
For more information on a wide variety of Smart Gardening topics, visit www.migarden.msu.edu or call MSU’s Lawn and Garden hotline at 1-888-678-3464.
This work is supported by the Crop Protection and Pest Management Program [grant no 2021-70006-35450] from the USDA National Institute of Food and Agriculture.


 Print
Print Email
Email


