


For Citizen Scientists
Detailed instructions for citizen scientists
Please follow these step by step instructions in order to submit your findings to this study!
Note: These are detailed instructions for participants in the project. Before diving into these instructions you may want to check out our About page to learn more about this study and you should also check out these video resources.
Step 1. Locate a common milkweed patch you can study.
First you’ll need to be sure you’ve correctly identified common milkweed. It often grows in dense patches which are connected below ground. The easiest giveaway is to tear a leaf to see if it produces drops of milky white latex. Here is an identification guide if you’d like more information. The closest look-alike is swamp milkweed, which also produces milky latex but has pointier leaves, grows in wet soils, and does not usually form dense patches.
If you have access to two or more patches of milkweed growing in similar conditions, jump down to use these instructions instead.
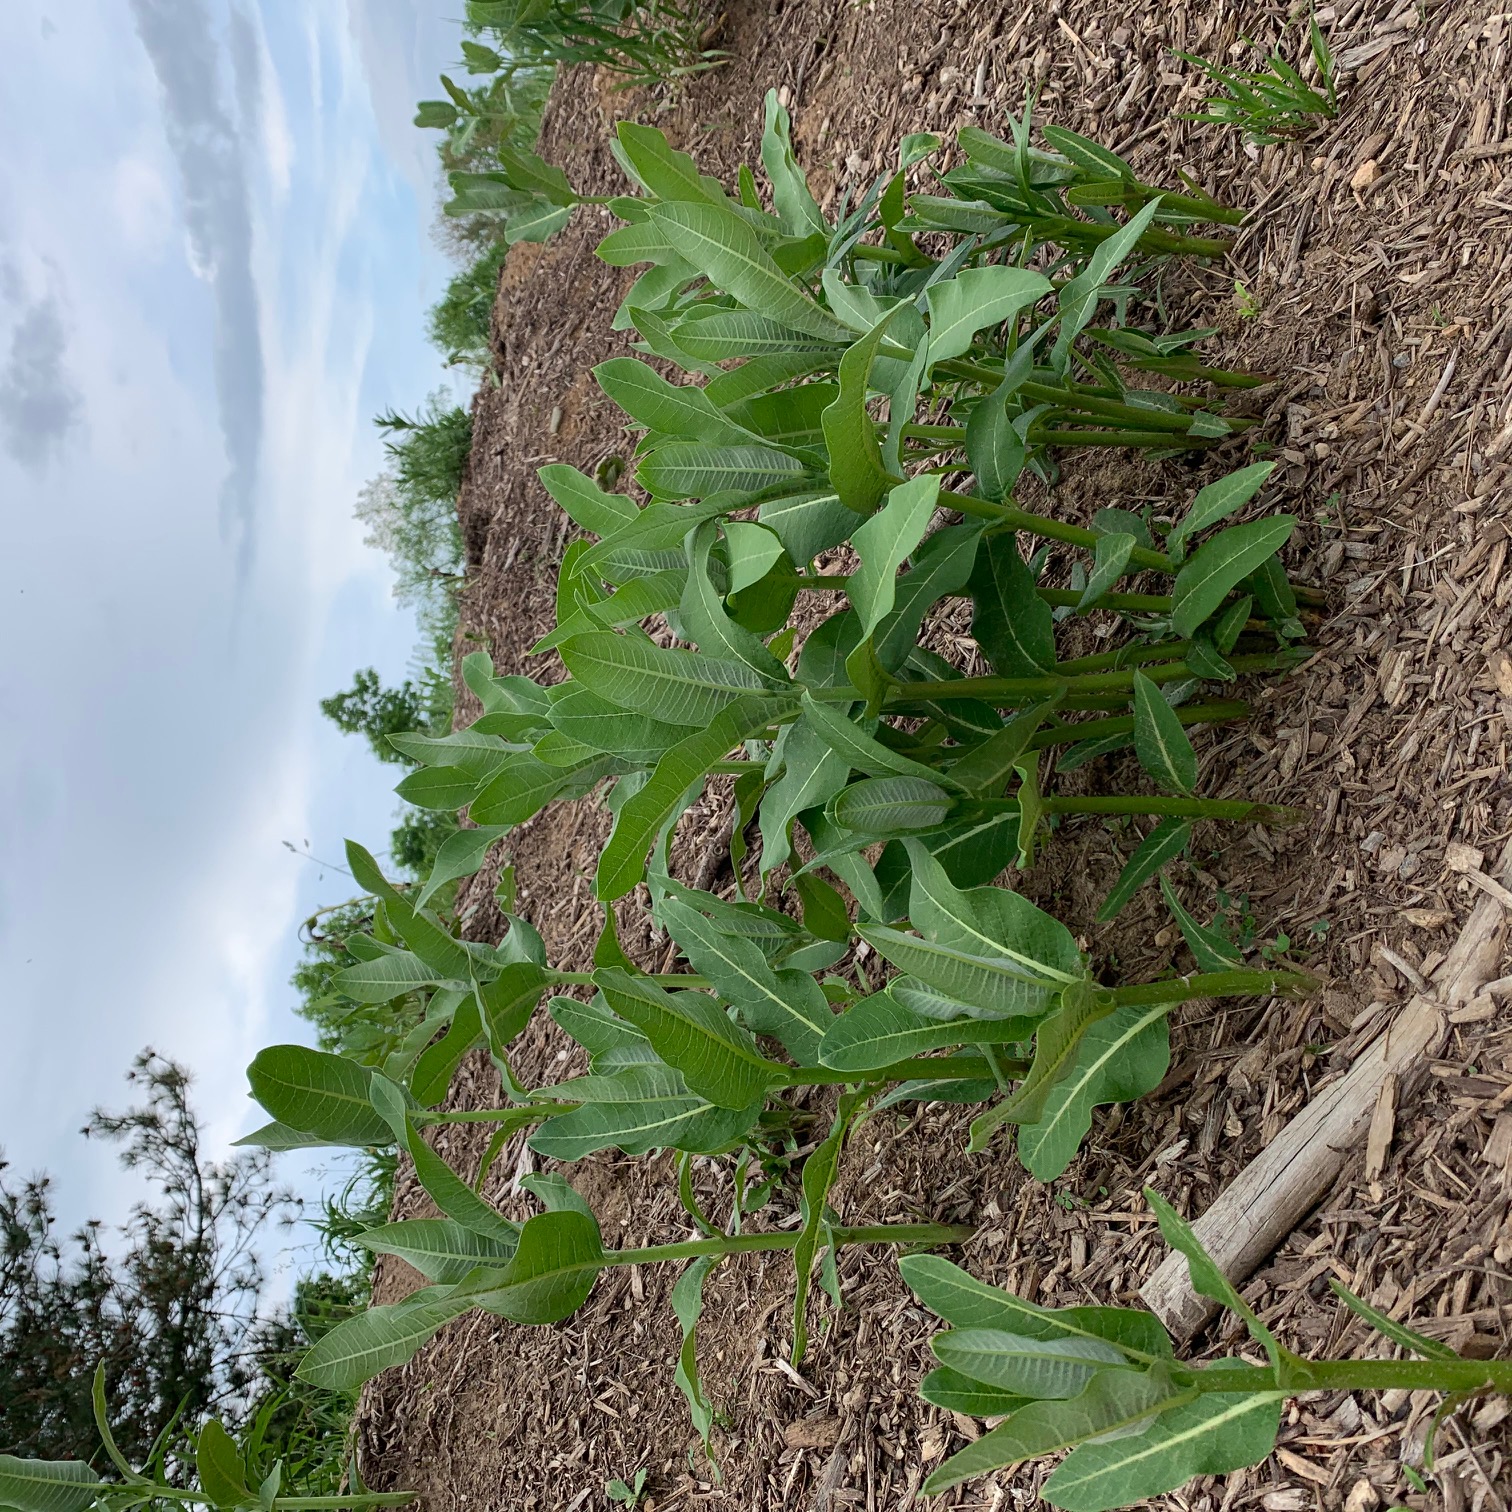
The milkweed patch can be any size, ranging from a few stems to several hundred. Stems usually don’t emerge until late May, but often you can scout a patch and see how big it’s likely to be by looking at last year’s growth (photo here) Keep in mind, sometimes stems aren’t visible until early June! Also, some patches are very dense, while others are more spread out with a few stems here or there -- either type works fine for this study.
Be sure to write down the total number of stems in the milkweed patch before cutting so you can enter it in the site registration form later.
Step 2. Divide the patch in half and determine which side will be cut
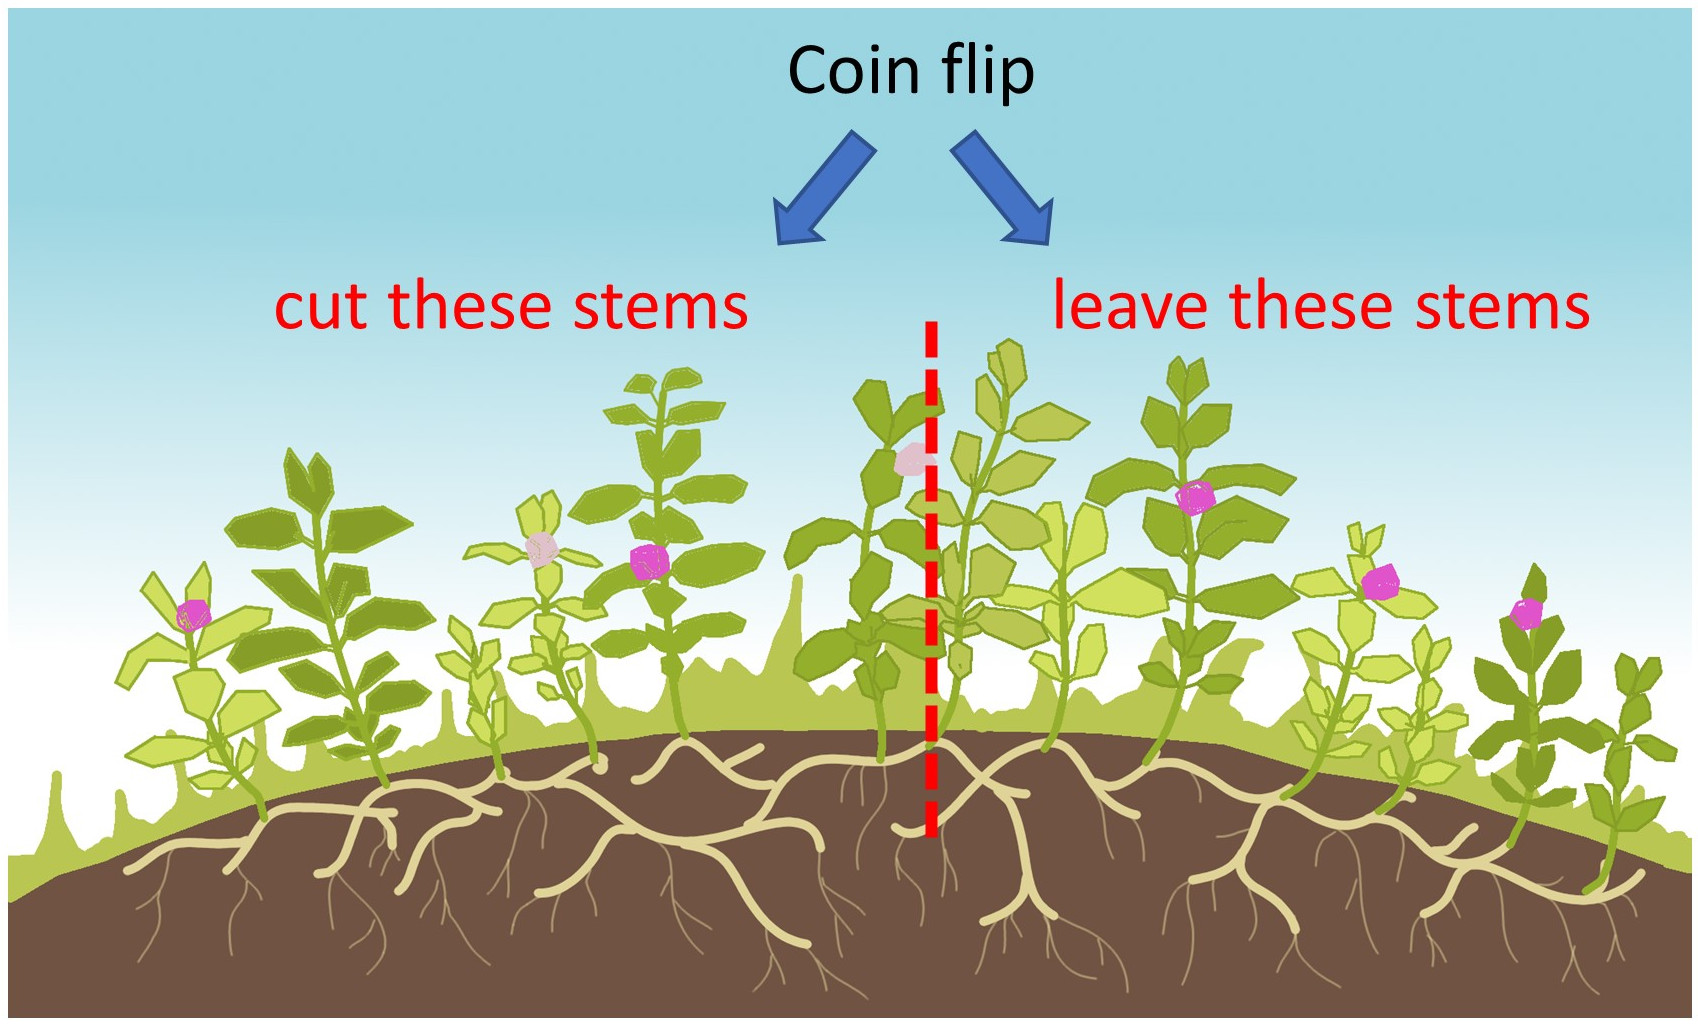
It doesn’t matter how you divide the patch, so long as about half the stems are in the area that will be cut and the other half will be left alone. We usually mark the boundary between halves with flags, colored string, or flagging tape but you can use whatever’s convenient. Then it’s just a matter of flipping a coin and saying “okay, I’ll cut back the left half of the patch if heads, the right half if tails.”
Step 3. Register your milkweed patch (REGISTRATION CLOSED)
Fill out a (one patch) site registration form to introduce your milkweed patch into our records.
The form will ask you to choose a PIN, which you will then enter each week so we can link the data you collect over the next several weeks to your milkweed patch. The PIN can be made of numbers and/or letters so you can choose something you will remember. Please be aware that we can see your PIN, so don’t use the same code you might use for an ATM or debit card.
You can repeat steps 1-4 for as many milkweed patches as you like -- you’ll just need to make a unique PIN number for each one on the form. For example, the PIN for your first patch could be ‘1234yard’ for the patch at the edge of your backyard and ‘1234ditch’ for the one in the ditch.
Step 4. Cut the milkweed!
Note: Be safe and only use tools in the way they were intended! If you’re under 18, be sure to do this step with adult supervision.
This step should occur whenever common milkweed in your area is just beginning to flower. ** We are based in southern Michigan, where this happens around June 15. If you’re south of us milkweeds might flower at the beginning of June, and if you’re north of us it could be closer to July. Cut the milkweed stems in the half of the milkweed patch you determined with the coin toss. The goal should be to cut stems to a height of about 2-4 inches. Different people have different tools available to them, and we are interested in learning whether some tools are more effective than others. So use what you have! Some hand tools will cut the milkweed without disturbing the other vegetation that grows alongside it, while motorized tools will probably cut all vegetation in the treatment area to the same height. Again, either way is fine. Milkweed is full of white latex which will drip out of stems as you cut them. It contains some toxic chemicals that keep insects away, so be sure to keep it out of your eyes and mouth.
**If you are joining us in July for the second round, your milkweed can be at any stage!
Tools you can use include hand pruners or loppers, a string trimmer or brush trimmer, or a brush mower or other cutting implement pulled behind a tractor. It might feel weird to chop down a perfectly good crop of milkweed stems, but usually within a week or two you will see new growth coming up. Sometimes new growth will start from buds on the stems you trimmed; other times it will emerge directly from the roots. We leave the cut stems where they fall so any hidden larvae can crawl to a new plant, or feel free to remove them for aesthetic reasons if you wish.
If you find monarch caterpillars on the milkweed you’re about to cut, feel free to move them somewhere else before you begin cutting.
Step 5. Monitor weekly
Visit your milkweed patch once a week to monitor. We recommend checking your milkweed patch beginning a week after you mowed. If no stems are up yet, check back the next week and start submitting data when some stems have come up.
There are three options for submitting data:
- Use this online data form
- Download our data collection smartphone/tablet app here. (will not work on computer).
- Download this paper data collection sheet to print, fill it out, and email us a picture or scan of it each week at MSURegrow@gmail.com
The data form will ask you to count the number of milkweed stems in the regrowing or uncut part of the patch, as well as the number of monarch eggs, caterpillars under 1 inch long (which is all of them except the fifth instar, or final growth stage), and caterpillars 1 inch or larger. Don’t worry if you can’t monitor exactly weekly -- if it’s off by a few days that’s fine. And if you skip a week, don’t worry, you can start up again the next week. You can check the plants at any time during daylight hours.
Each week you’ll need to enter the PIN for your milkweed patch so we can link it to the information that was logged when you registered your site. Then, it’s a matter of counting monarch eggs and caterpillars in each plot and reporting them using the app. You’ll also record the number of milkweed stems present each week, since it will change over time as some die back and new ones grow.
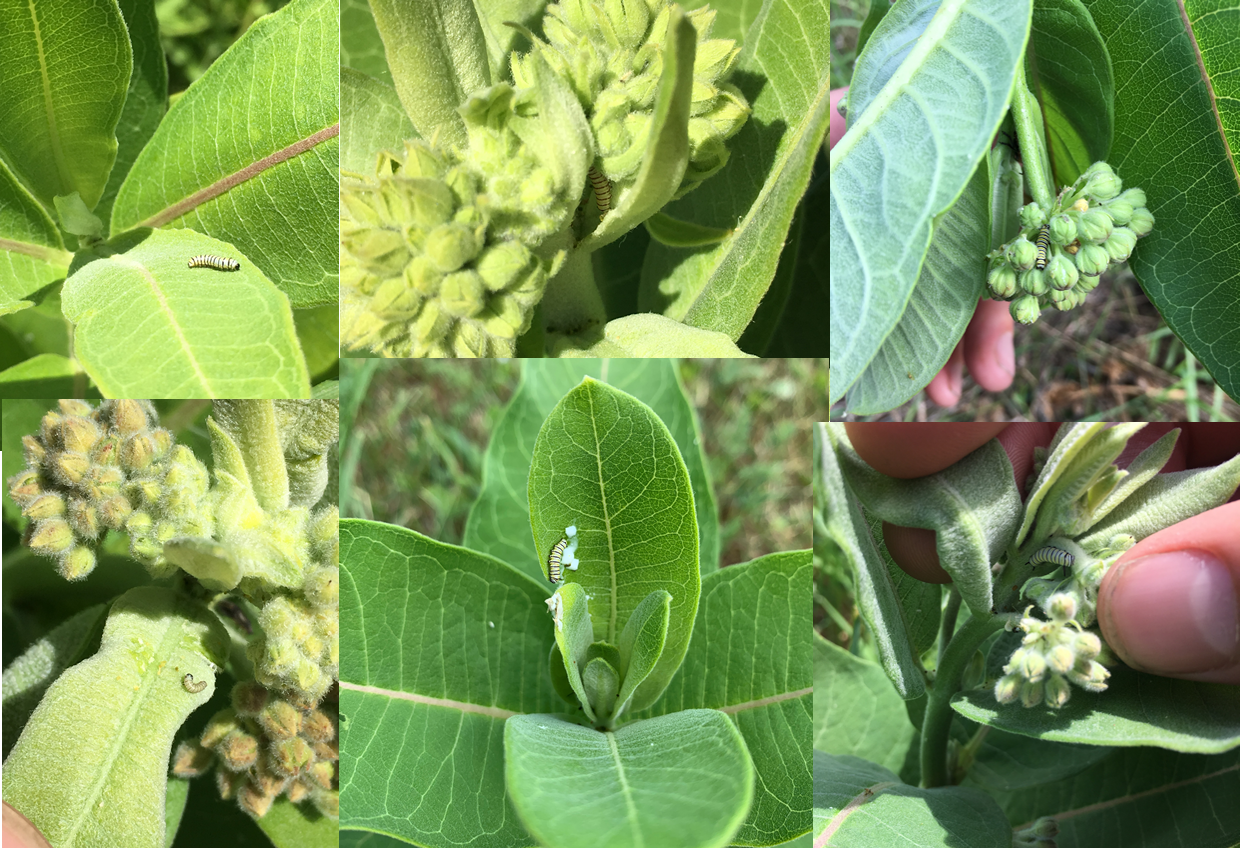
When looking for monarchs you can start with either the unmowed milkweed stems or the ones that are regrowing. For each stem in that plot, look at the top and bottom surface of every leaf and record the number of eggs and caterpillars using the +/- buttons on the app. Be sure to check the newest leaves that are folded up at the tip of the stem -- hatchling monarchs like to hide here. Here’s a guide to help you identify monarchs and differentiate them from other insects and look-alikes. If you’re still stumped, feel free to share a photo with us over email and we’ll be happy to verify it.
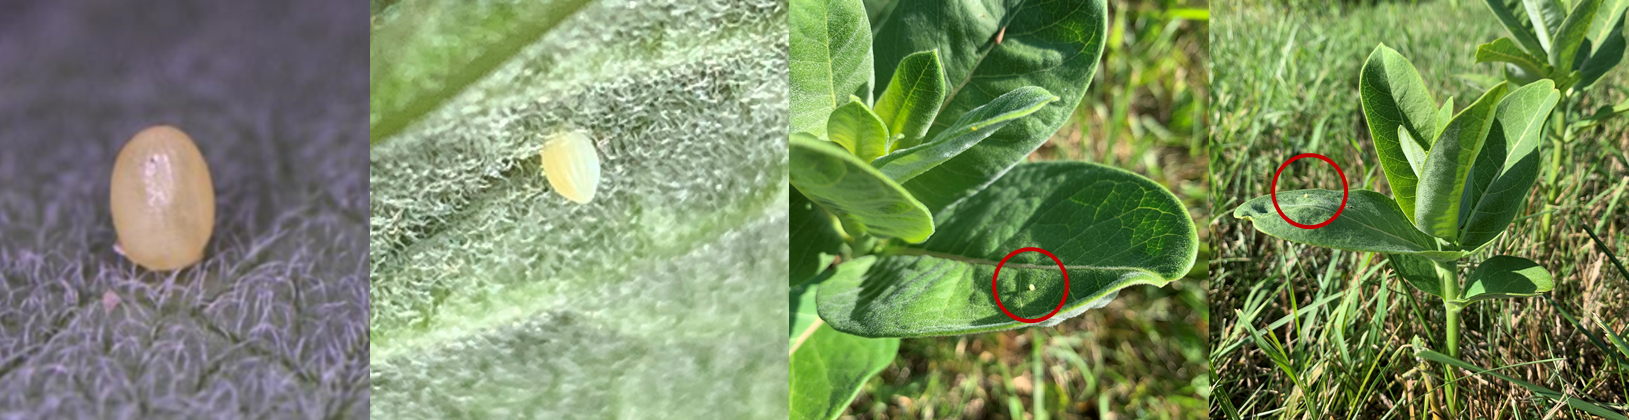
Monarch eggs can be tricky to tell apart from dried up drops of milkweed latex. They should be barrel-shaped with faint ribs or stripes going up the side. When they’re just about to hatch, they become clear and inside you can see a black dot which is the caterpillar’s head.
Step 6. RESULTS!
Each week we will post results of the study on our website so you can see how it’s working. We’ll also keep in touch periodically with updates, articles about milkweed and monarch natural history, and some photos from the project.
Detailed instructions for citizen scientists with two milkweed patches
Step 1. Locate a pair of milkweed patches you can study.
**We are especially interested in data from participants who are able to compare monarch use in two milkweed patches: one that is partially mowed, and one that is totally undisturbed. This is because fifth-instar caterpillars (the last stage before they become a chrysalis) are able to move large distances, so it is only by comparing their abundance in two separate milkweed patches that we can get accurate data on the effect on fifth-instars. Participants who are comparing regrowing and uncut stems within a single patch can provide good data about eggs and early-stage caterpillars, but if they find fifth-instar caterpillars it is impossible to know whether that caterpillar came from the regenerating or uncut stems.
Here is an easy guide to identifying common milkweed. If you’re not sure you identified milkweed correctly, feel free to contact us with a photo and we can confirm that it’s the right species. Depending on COVID-19 restrictions in your area, your search might be limited to your backyard or a neighbor’s. If it’s not on your property, be sure you have permission to study and manage it!
Ideally the two patches of milkweed will be growing in similar conditions and be around the same size. We are hoping that each patch will contain ~20 or more stems.
Stems usually don’t emerge until late May, but often you can scout a patch and see how big it’s likely to be by looking at last year’s growth (photo here). Keep in mind, sometimes stems aren’t visible until early June! Also, some patches are very dense, while others are more spread out with a few stems here or there -- either type works fine for this study.
Be sure to write down the total number of stems in both milkweed patches before cutting so you can enter this in the form later.
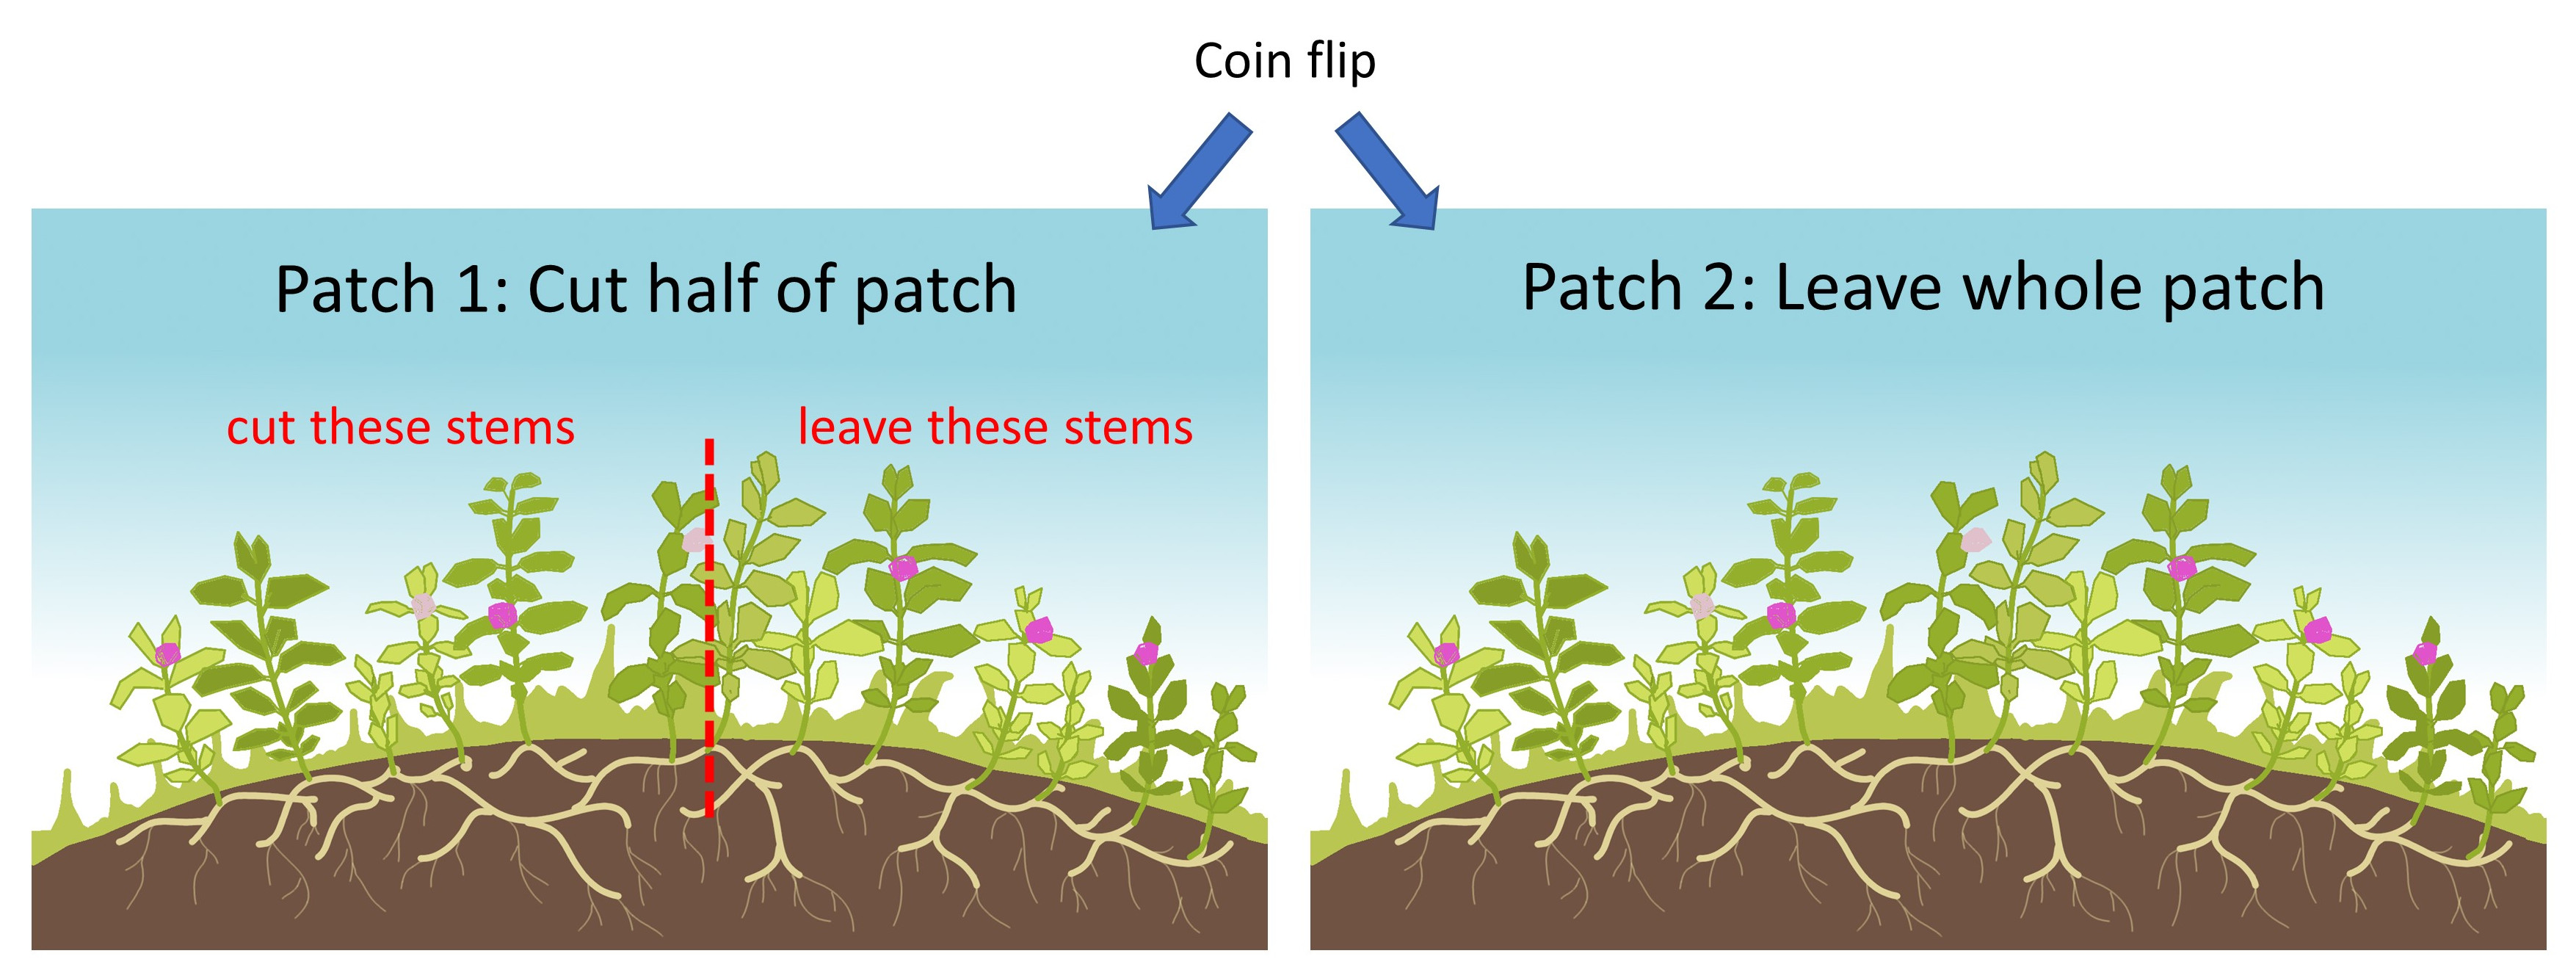
Step 2. Determine which patch will be cut
Heads or tails! Please note that you’ll be cutting back only half of the patch that is assigned to the cutting treatment, like in the picture below. This is important because we’ve found in past research that even though most eggs will likely be laid on the regrowing stems, when the caterpillars mature they often prefer to move onto older stems.
Step 3.Register your milkweed patches (REGISTRATION CLOSED)
Fill out a (two patch) site registration form so your pair of milkweed patches is added to our records. We’ll also ask you to choose a PIN for the patch so we can track it through time.
The form will ask you to choose a PIN, which you will then enter each week so we can link the data you collect over the next several weeks to your milkweed patch. The PIN can be made of numbers and/or letters so you can choose something you will remember. Please be aware that we can see your PIN, so don’t use the same code you might use for an ATM or debit card.
Step 4. Cut the milkweed!
Note: Be safe and only use tools in the way they were intended! If you’re under 18, be sure to do this step with adult supervision.
This step should occur whenever common milkweed in your area is just beginning to flower. We are based in southern Michigan, where this happens around June 15. If you’re south of us milkweeds might flower at the beginning of June, and if you’re north of us it could be closer to July.
If you are joining us in July for the second round, your milkweed can be at any stage!
Cut back half of the milkweed patch you determined with the coin toss, and leave the other one alone. The goal should be to cut stems to a height of about 2-4 inches. Different people have different tools available to them, and we are interested in learning whether some tools are more effective than others. So use what you have! Some hand tools will cut the milkweed without disturbing the other vegetation that grows alongside it, while motorized tools will probably cut all vegetation in the treatment area to the same height. Again, either way is fine. Milkweed is full of white latex which will drip out of stems as you cut them. It contains some toxic chemicals that keep insects away, so be sure to keep it out of your eyes and mouth.
Tools you can use include hand pruners or loppers, a string trimmer or brush trimmer, or a brush mower or other cutting implement pulled behind a tractor. It might feel weird to chop down a perfectly good crop of milkweed stems, but usually within a week or two you will see new growth coming up. Sometimes new growth will start from buds on the stems you trimmed; other times it will emerge directly from the roots. We leave the cut stems where they fall so any hidden larvae can crawl to a new plant, or feel free to remove them for aesthetic reasons if you wish.
If you find monarch caterpillars on the milkweed you’re about to cut, feel free to move them somewhere else before you begin cutting.
Step 5. Monitor weekly
Visit your milkweed patch once a week to monitor. We recommend checking your milkweed patch beginning a week after you mowed. If no stems are up yet, check back the next week and start submitting data when some stems have come up.
There are three options for submitting data: (Links now disabled)
- Use this online data form
- Download our data collection smartphone/tablet app here. (will not work on computer)
- Download this paper data collection sheet to print, fill it out, and email us a picture or scan of it each week at MSURegrow@gmail.com
The data form will ask you to count the number of milkweed stems each patch, as well as the number of monarch eggs, caterpillars under 1 inch long (which is all of them except the fifth instar, or final growth stage), and caterpillars 1 inch or larger. Since you are comparing two separate milkweed patches, when the data forms ask you to record the number of stems or monarchs in the regrowing part of a patch, you should record all the stems in the patch where you cut half of the stems back, since you're comparing this patch to another patch that was totally left alone. Don’t worry if you can’t monitor exactly weekly -- if it’s off by a few days that’s fine. And if you skip a week, don’t worry, you can start up again the next week. You can check the plants at any time during daylight hours.
Each week you’ll need to enter the PIN for your milkweed patch so we can link it to the information that was logged when you registered it in June. Then, it’s a matter of counting monarch eggs and caterpillars in each patch and reporting them using the app. You’ll also record the number of milkweed stems present each week, since it will change over time as some die back and new ones grow.
When looking for monarchs you can start with either the patch with only unmowed milkweed stems or the patch that contains regrowing stems. For each stem in that patch, look at the top and bottom surface of every leaf and record the number of eggs and caterpillars using the +/- buttons on the app. Please search all the stems in the plot you split in half, including the section you left undisturbed. Be sure to check the newest leaves that are folded up at the tip of the stem -- hatchling monarchs like to hide here. Here’s a guide to help you identify monarchs and differentiate them from other insects and look-alikes. If you’re still stumped, feel free to share a photo with us over email and we’ll be happy to verify it.
Monarch eggs can be tricky to tell apart from dried up drops of milkweed latex. They should be barrel-shaped with faint ribs or stripes going up the side. When they’re just about to hatch, they become clear and inside you can see a black dot which is the caterpillar’s head.
Step 6. RESULTS!
Each week we will post results of the study on our website so you can see how it’s working. We’ll also keep in touch periodically with updates, articles about milkweed and monarch natural history, and some photos from the project.
 Print
Print Email
Email