How to create a Person Profile in dotCMS
 Print
Print Email
EmailLearn how to create a Person Profile in dotCMS.
- Log into dotCMS.
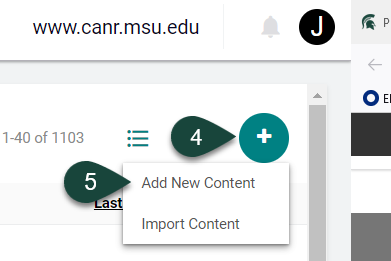
- Select Content on the left side of the screen.
- Select Search to display the Content dashboard.
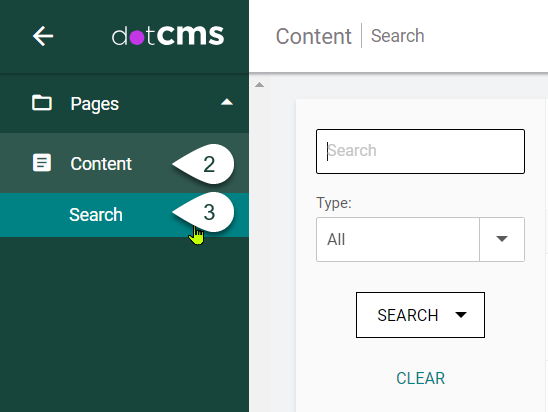
Content Dashboard
- Select the circled plus sign (+) on the far right side of the screen.
- Select Add New Content
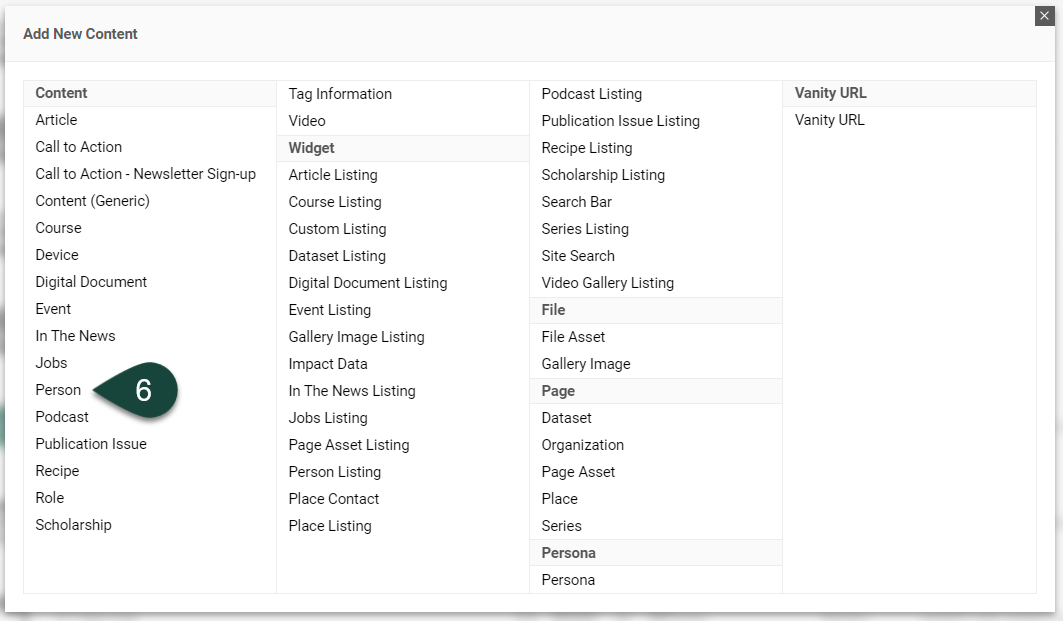
- Select Person on the menu.
Person: Content Tab
NOTE: It is highly recommended that you read the Hint Text that is noted in smaller text above most fields prior to filing in that particular field. The Hint Text provides information or guidelines on how to properly complete each field.
- Host - REQUIRED FIELD: Open the Host drop-down menu.
- Select the Plus Sign (+) to open the www.canr.msu.edu folder.
- Select the Folder of the site you where you want to save the Person profile.
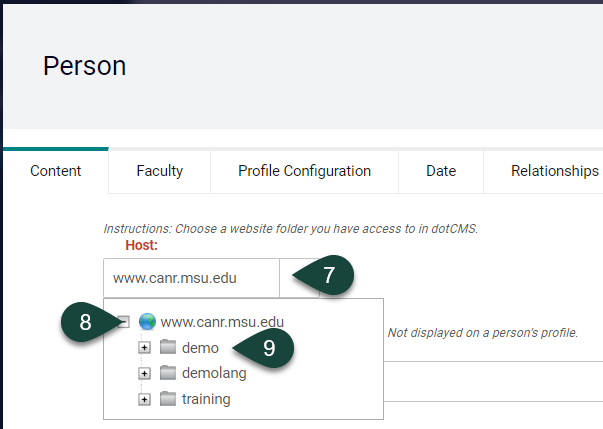
NOTE: If you forget to select the folder in the Host field, then when you attempt to publish the person profile you will receive an error stating that “You don't have the required permissions to save the asset. User has no Add Children Permissions on selected host.” This usually means you've forgotten to select your folder from the "Host/Folder" field at the top of the page (above Title). Follow the steps above and republish the person profile. It should publish properly this time.
- Title - REQUIRED FIELD: Enter the person’s first and last name as the Title of the person profile.
NOTE: This title is for back-end searching only. This Title is not displayed on the person's page.
- URL Title - REQUIRED FIELD: URL Title will fill in automatically; however, you may change this if you prefer a shorter or different URL.
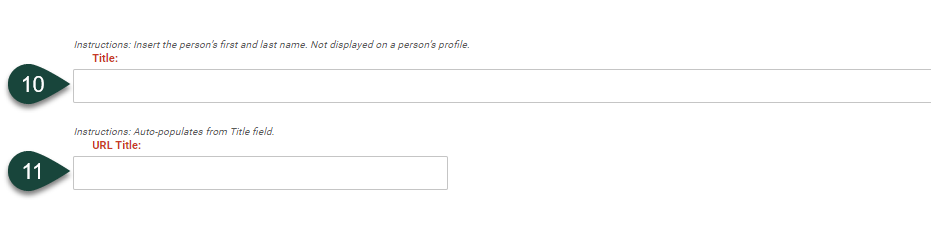
PHOTO FIELDS
There are three optional fields for images, which are labeled as:
(Step 12) Image,
(Step 13) 3:2 Horizontal Image, and
(Step 14) Square Image
For these optional image fields, you can upload the same image of the person. Each image would have a different crop uploaded for each field. If you choose to upload a main/primary image in the first field (step 12), then it is recommended that you also upload an image in the other two image fields to ensure a favorable crop display of your image. If you do not upload or select an image for step 13 or step 14, then dotCMS may auto-crop your main/primary image (photo uploaded in step 12) to be displayed on a certain page or widget, which may or may not be a favorable crop.
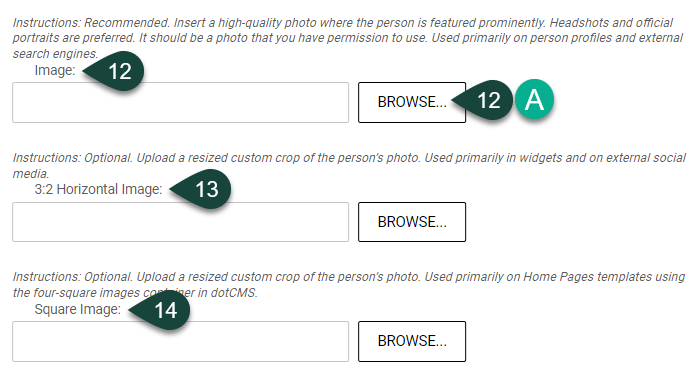
- Image – OPTIONAL BUT RECOMMENDED FIELD: The main IMAGE field is where you can upload the primary photo for the person profile using the Browse button (step 12.A). This image is displayed on the person’s profile, Person Listing widgets (directories), and in search engines.
To upload a new photo or to select an existing photo:
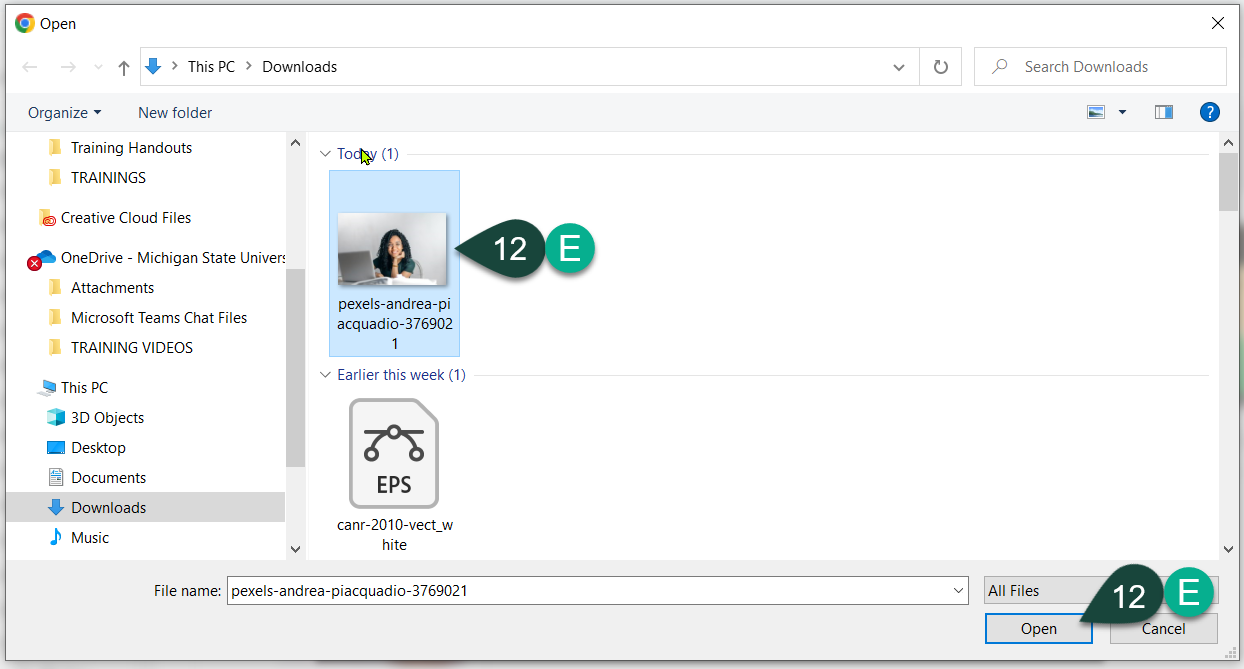
12-A. Select the Browse button for the Image field.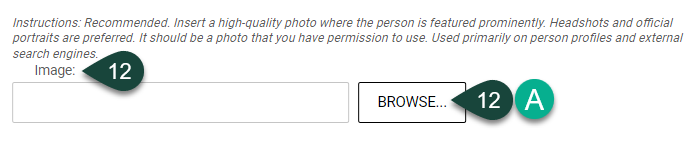
12-B. From the Select a file window, navigate to the Uploads/Images folder on your site.
12-C. Either select an image that was previously uploaded to the Images folder, or select the Upload New File button to upload a new image from your computer.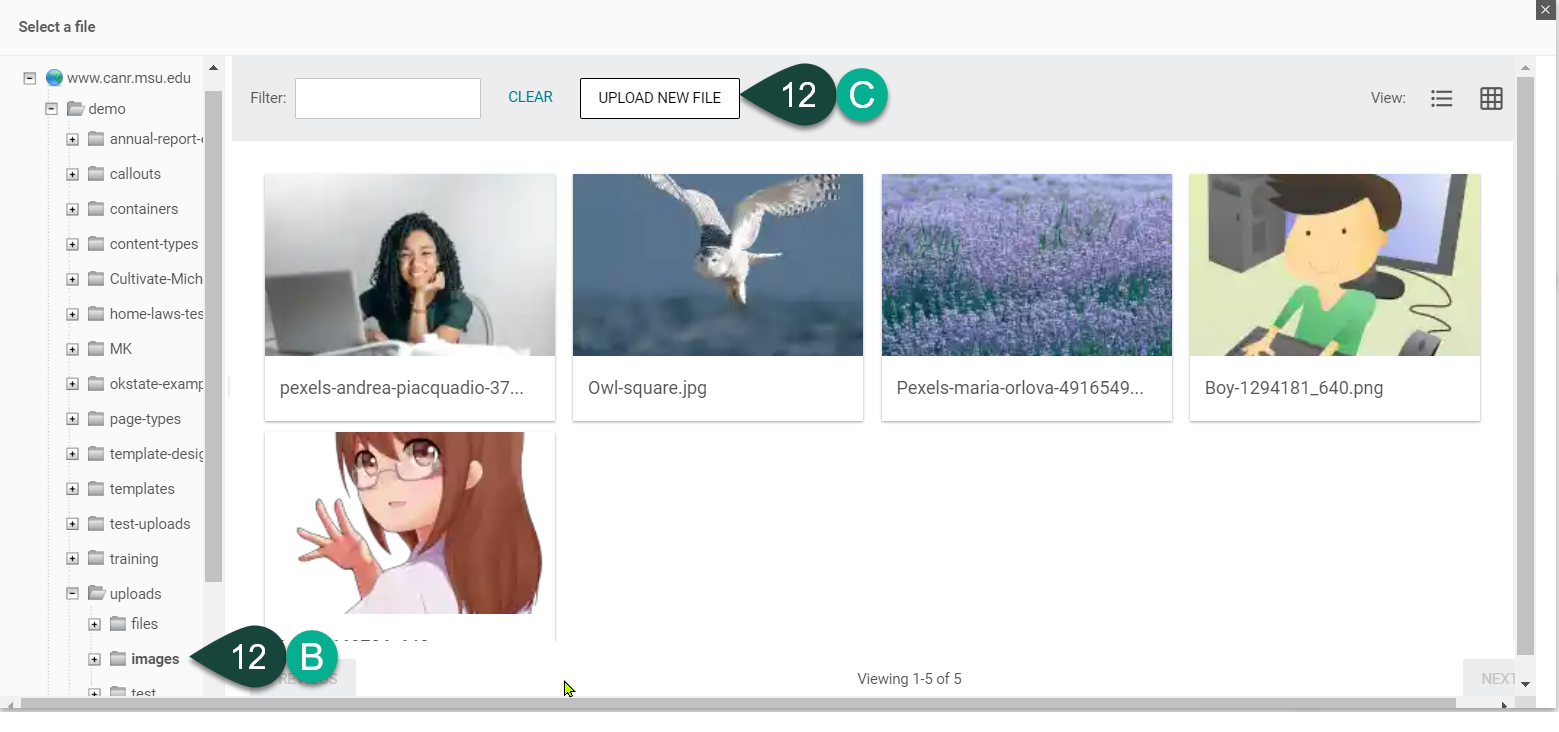
12-D. If you selected Upload New File, then click on the Select File(s) to Upload button.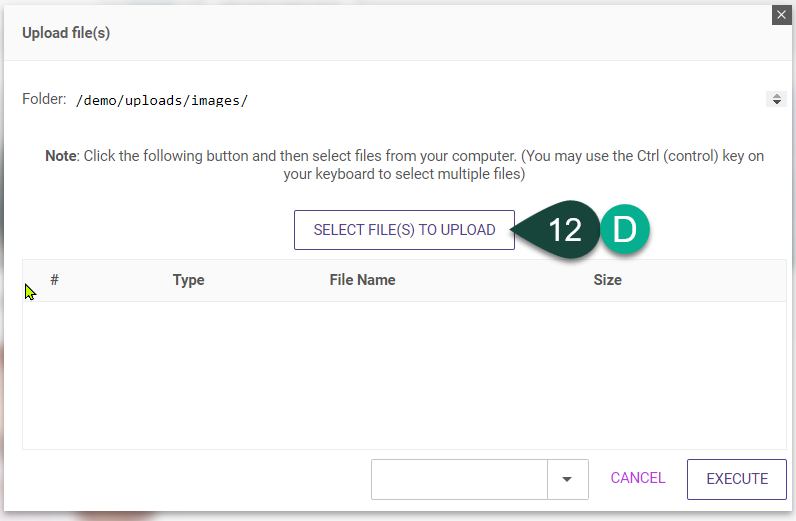
12-E. Navigate to where the image file resides on your computer, choose the file, and then select Open.
TIP: Image should be a high-quality photo (.JPG or .PNG file formats preferred) where the person is featured prominently and ensure that you have permission to use the photo. Headshots and official portraits are preferred.
NOTE: If a photo is not uploaded, then a placeholder graphic will appear on the person’s profile and in Person Listing widgets (directories). - 3:2 Horizontal Image – OPTIONAL FIELD: This image field is for a 3:2 (ratio 3 wide by 2 tall) horizontal-cropped image that is a resized custom crop of the primary photo for use in widgets and on social media. You will need to crop the image in a photo editing application of your choice prior to uploading it to this field. See steps 12.A-E for photo upload instructions.
NOTE 1: You will still need to upload the original sized primary photo in the main IMAGE field in step 12.
NOTE 2: If a custom crop photo is not uploaded in this field, then dotCMS will custom crop it for you, which may or may not a favorable outcome, so it is recommended that you crop your photo in advance.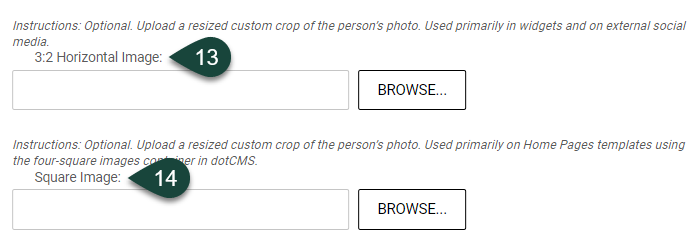
- Square Image – OPTIONAL: This field is for a square image (ratio 1 wide by 1 tall) that is a resized custom crop of the primary photo for use on home page templates using the four-square images container in dotCMS, and on the person’s Profile page. See step 12.A-E for photo upload instructions.
NOTE 1: You will still need to upload the original sized primary photo in the main IMAGE field in step 12.
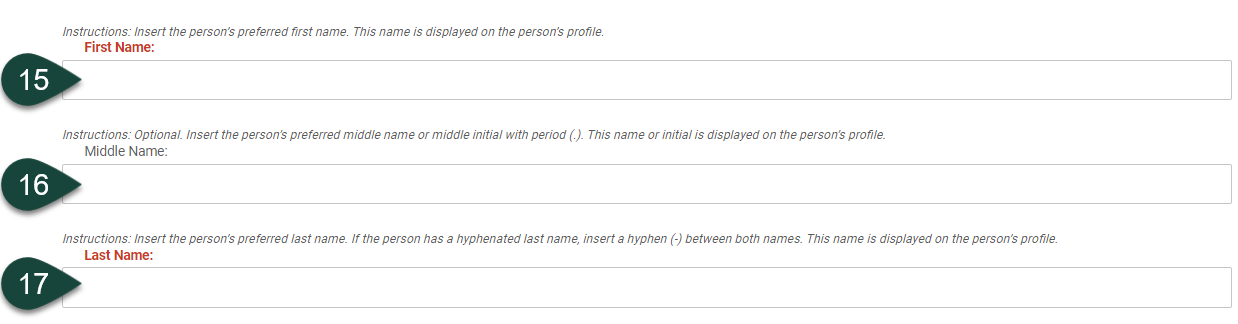
NOTE 2: If a custom crop photo is not uploaded in this field, then dotCMS will custom crop it for you, which may or may not a favorable outcome, so it is recommended that you crop your photo in advance. - First Name – REQUIRED FIELD: Enter the person’s preferred First Name. This field is displayed on the person’s profile and Person Listing widgets (directories).
- Middle Name – OPTIONAL FIELD: Enter the person’s preferred Middle Name or middle initial with period(.). This field is displayed on the person’s profile and Person Listing widgets (directories).
- Last Name – REQUIRED FIELD: Enter the person’s preferred Last Name. This field is displayed on the person’s profile and Person Listing widgets (directories).
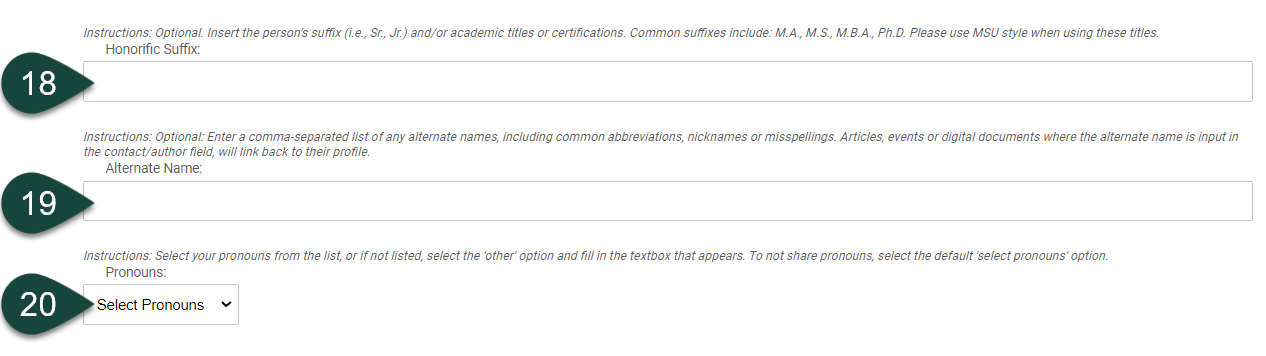
- Honorific Suffix - OPTIONAL FIELD: Enter the person’s Honorific Suffix (i.e., Sr., Jr.) and/or academic titles or certifications. Please use MSU style when using these titles. This field is displayed on the person’s profile and Person Listing widgets (directories).
NOTE: Common degree-related suffixes include: M.A., M.S., M.B.A., Ph.D. - Alternate Name – OPTIONAL FIELD: Enter any Alternate Name for the person, including common abbreviations, maiden names, nicknames, and misspellings separated by commas. This field is not displayed on a person's profile.
NOTE: If someone searches using these alternatives, the person’s name will appear in the search result. Additionally, articles, events, or digital documents where the alternate name is input in the contact/author field will link back to their profile. - Pronouns – OPTIONAL FIELD: Using the drop-down menu, select the pronouns provided by the person.
- Roles – OPTIONAL FIELD: To create a Role or to relate a role to a person’s profile, select the Relate button. The Role content type is helpful for people who serve multiple departments or have multiple job responsibilities. This allows a person’s multiple titles/roles to appear on their Person profile web page with their “primary” role/title appearing first. Each person can only have one primary role. The Role content type also allows a person’s role/title to display on separate person listing widgets (directories) on related websites, as appropriate.NOTE: A Role needs to be created for every new Person profile. You can create a Role or relate a role to a Person only AFTER a Person profile is created and saved or published to dotCMS. If a Person’s profile does not exist yet in dotCMS, then you cannot create a Role for that Person until their Person profile is done.
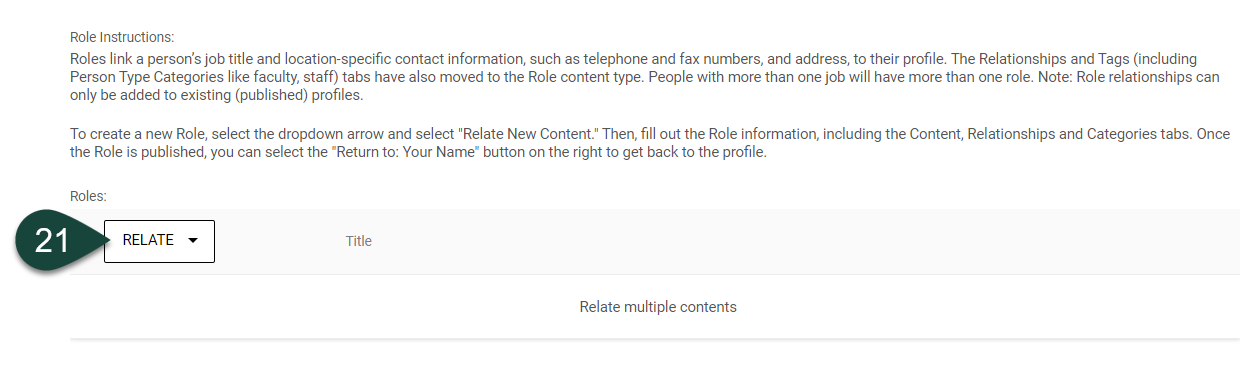
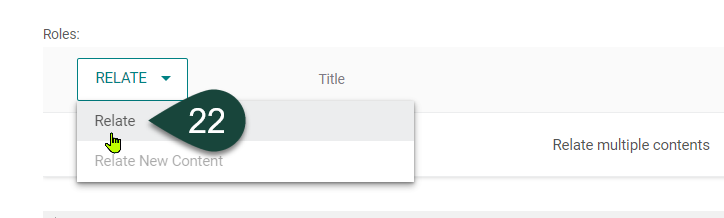
- To relate a Role that has already been created for a person in dotCMS, select Relate from the drop-down menu.
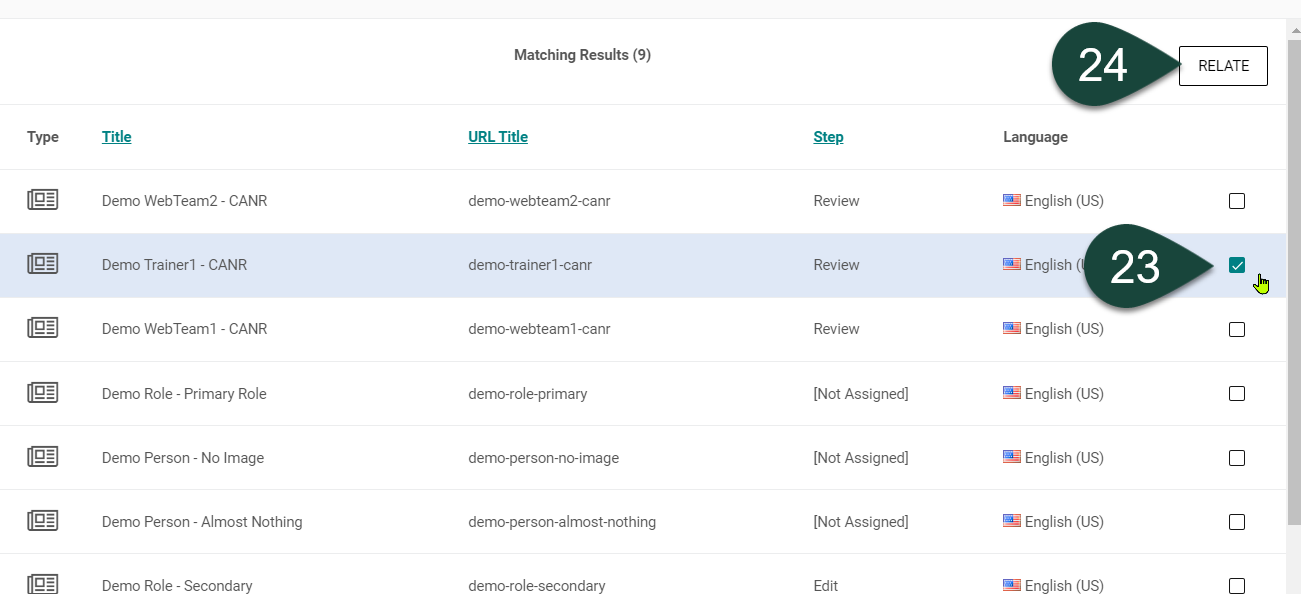
- Select the Role that matches the person.
- Select the Relate button.
- Email – OPTIONAL: Enter the person’s primary work Email address. This field is displayed on the person’s profile and Person Listing widgets (directories).
- MSU NetID - OPTIONAL, BUT HIGHLY RECOMMENDED FIELD: Enter the person’s MSU NetID. This field is not displayed on the person’s profile.
TIP: Fill in this field to help prevent the creation of duplicate person profiles.NOTE: If the person is not an MSU employee, then skip this field.
- Cell Phone – OPTIONAL FIELD: Enter the person’s Cell Phone number if they want it displayed on their profile.
TIP:: XXX-XXX-XXXX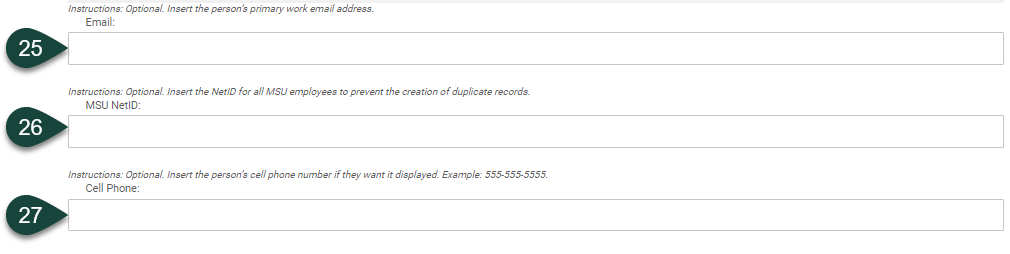
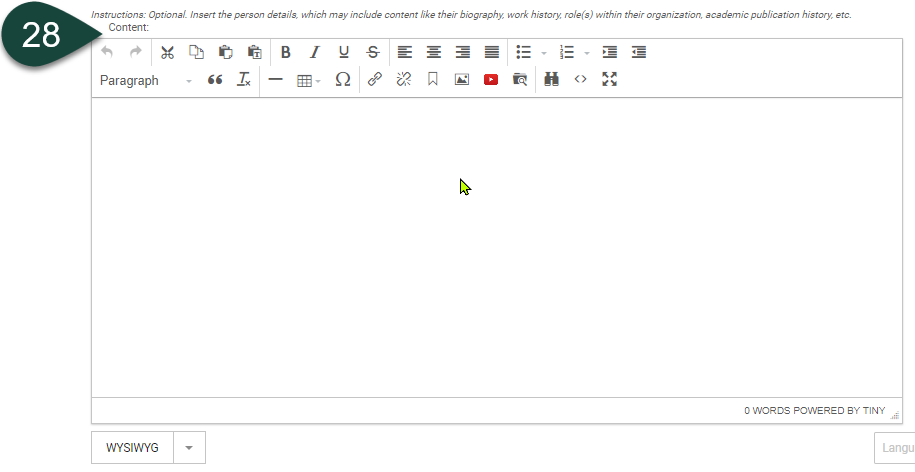
- Content – REQUIRED FIELD: Use the WYSIWYG Editor to enter and format the person’s Content.
TIP: This may include content like their biography, work history, role(s) within their organization, academic publication history, etc.
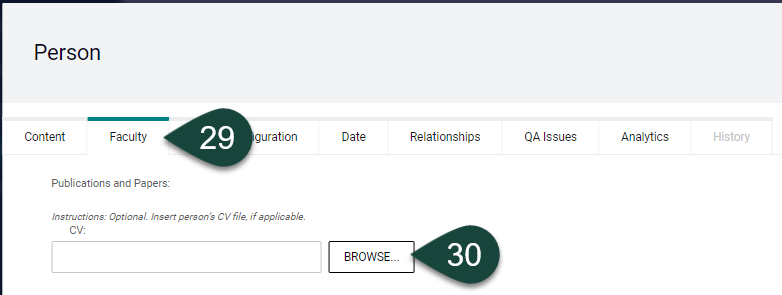
Person Faculty Tab
- Select the Faculty Tab at the top of the screen. This tab allows you to input degree and CV details related to the person’s profile.
- CV - OPTIONAL FIELD: Upload a PDF of the person’s CV by selecting the Browse button, if applicable.
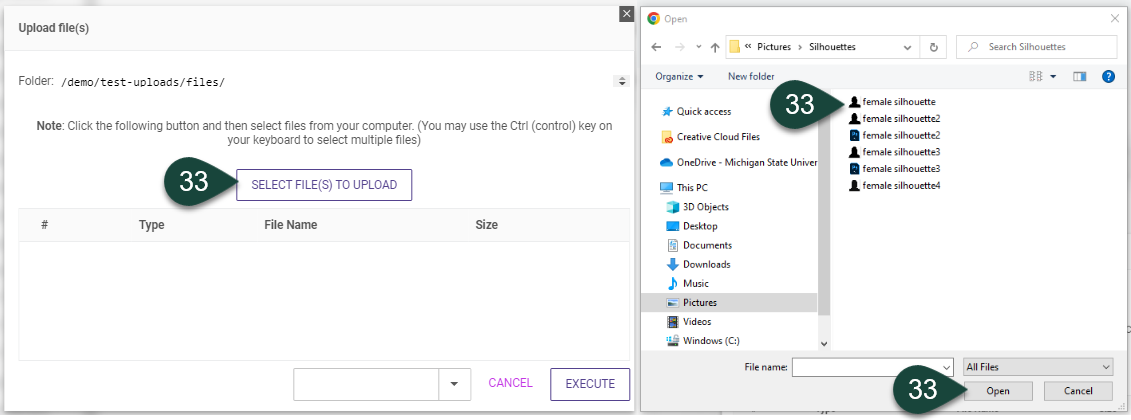
- If you selected the Browse button, then from the Select a file window, navigate to the Uploads/Files folder on your site.
- Either select a file that was previously uploaded to the Files folder or select the Upload New File button to upload a new file from your computer.

- If you selected Upload New File in Step 32, then click the Select File(s) to Upload button and navigate to where the file resides on your computer, and choose the file name and select Open.
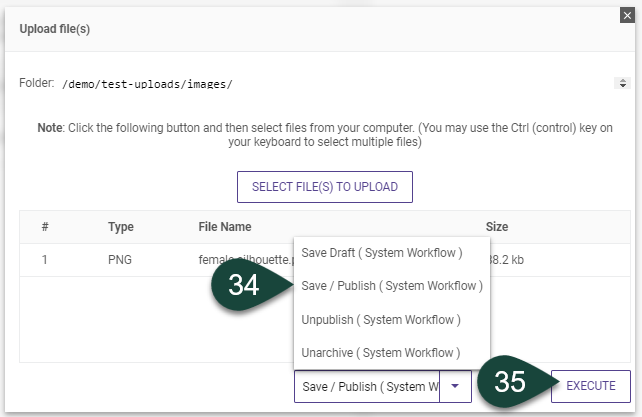
- Select the Save/Publish button. By selecting Save/Publish for the file you are preparing it for publishing live with the person profile. It will not appear on the page until you Publish the Person profile.
NOTE: DO NOT select the Save button. This will only save the file to the backend of the website as unpublished, and it will not appear live when you publish the person profile. - Select Execute.
- Degree – OPTIONAL FIELD: Enter the person’s Degree(s), including degree type, concentration and college/university where they received their degree, as applicable.
TIP 1: Ex. Bachelor of Science in construction management from Michigan State University.
TIP 2: If the person has multiple degrees, then enter each degree on a separate line.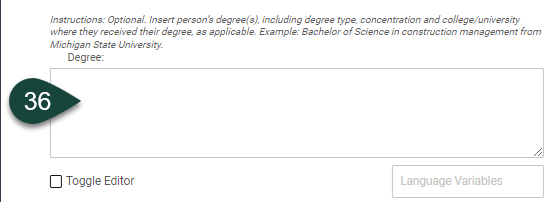
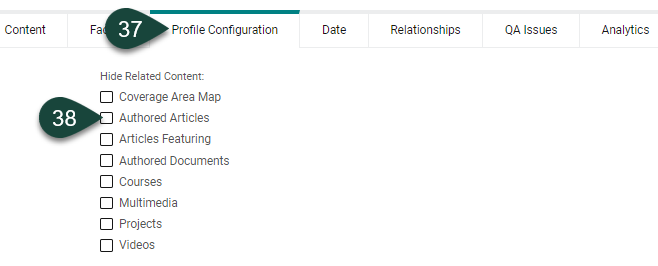
Profile Configuration Tab
- Select the Profile Configurations Tab at the top of the screen. This tab allows you to select which Related Content you choose to hide from a person's profile page, as needed. shows different content that can be related to a person’s profile.
- Select the check box next to the Related Content type that should be hidden from a person profile
Date Tab
- Select the Date Tab at the top of the screen. This tab allows you to select for a System Publish Date, a System Expiration Date and a Review On date.
TIP: It is best not to use the System Publish or Expiration Date features. Instead you can create and Save Draft of the person profile to Publish live on the date you want the profile published, and Unpublish the profile as needed.
NOTE: If you do use the fields in this tab, and you need to Unpublish the person profile, you will have to first remove the date/time information and Save Draft or Publish the profile. Then, you can select to Unpublish the Person profile. - To select a Review On date, choose the dropdown menu. Once a date is selected dotCMS will remind you to review the profile on that particular date.
TIP: It is recommended to review person profile content annually.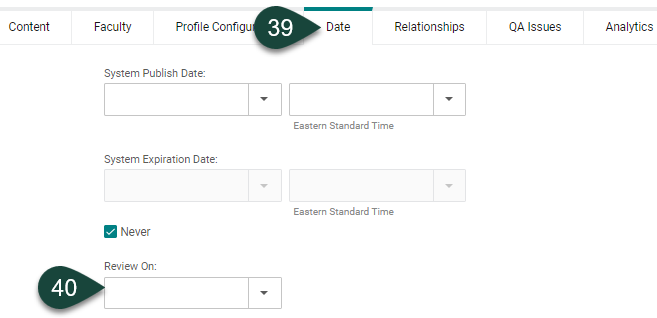
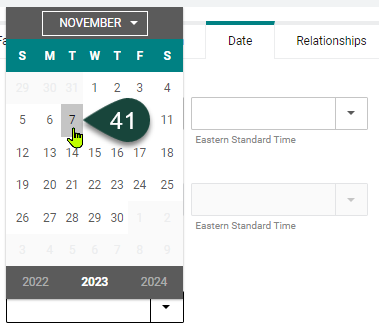
- Select the desired date, including month, day and year; and it will populate in this field.
Relationships Tab
Fields associated with the Relationships tab moved to the to the Role content type. Relationships can be managed by opening a person’s related role.
Tags Tab
The Tags tab has moved to the Role content type. Tags can be managed by opening a person's related Role.
Final Steps - Publish Content or Save Draft
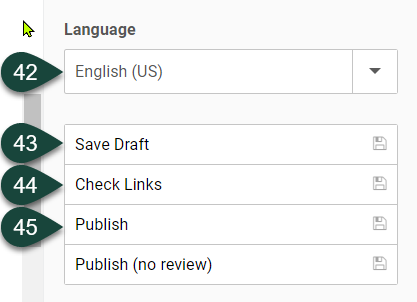
- The English language is the default for person profiles. You can skip this field.
- If you select the Save Draft button, it will save the person profile to the backend of dotCMS so you can still work on it before publishing it live.
- If you select the Check Links button, it will check the links in the person profile to make sure they work. If so, then the profile will be Published. If not, then an error message window will pop up letting you know which links need to be fixed.
- If you select the Publish button, it will Publish the person profile so it will appear live on the site.