


Editing Content Using the WYSIWYG Editor in dotCMS
 Print
Print Email
EmailThe WYSIWYG Editor allows you to enter/format text, images, and videos in a way that resembles how the content will appear on the website. Many content types, such as Events or Articles, contain a WYSIWYG Editor for entering the bulk of the information.

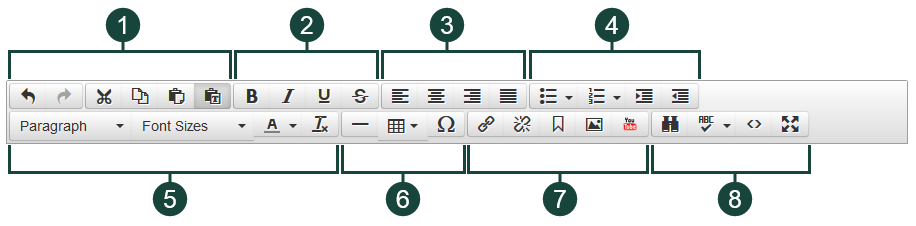
The 34 tools available in the WYSIWYG Editor are broken into eight categories including:
- Basic Commands: Undo, Redo, Cut, Copy, Paste, Paste as Text
- Text Styles: Bold, Italic, Underline, Strike-through
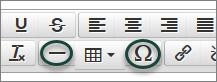
- Alignment: Align Left, Align Center, Align Right, Justify
- Lists and Indents: Bulleted List, Numbered List, Increase Indent, Decrease Indent
- Text Formatting: Headings/Paragraph, Font Size, Text Color, Clear Formatting
- Tables and Characters: Horizontal Line, Tables, Special Characters
- Links and Multimedia:
- Resource Commands: Find/Replace, Spell Check, Source Code, Full Screen
Basic Commands
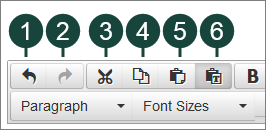
- Undo: Erases the last change applied to the document. (Control/Command + Z)
- Redo: Reverses the undo command and re-applies the last change to the document. (Control/Command + Shift + Z)
- Cut: Removes any selected text/images while placing the removed content on the clipboard to be pasted in another location. (Control/Command + X)
- Copy: Places the selected text/images on the clipboard to be pasted in another location. (Control/Command + C)
- Paste: Allows you to insert information from the clipboard into the editor. (Control/Command + V)
- Paste as Text: Allows you to insert text from the clipboard into the editor while also removing any formatting.
NOTE: This option is enabled by default and should not be disabled.
Text Styles

The following four text styles are available in the WYSIWYG Editor to add basic formatting to your text:
- Bold (Control/Command + B)
- Italic (Control/Command + I)
- Underline (Control/Command + U)
- Strike-through
Accessibility Quick Tip: It is recommended that you use more than only color to denote emphasis in text content such as using a text style or including a symbol like an asterisk.
NOTE: Holding the Shift key while pressing the Enter key will move the cursor directly to the next line without skipping lines/creating a new paragraph.
Alignment
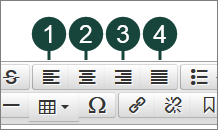
- Left Align: Aligns the left side of the text evenly, leaving the right side ragged.
- Center Align: Aligns the text along a center line, leaving both right and left sides ragged.
- Right Align: Aligns the right side of the text evenly, leaving the left side ragged.
- Justify: Aligns text evenly on both the right and left sides by adjusting the spacing between words on each line of text.
Lists and Indents
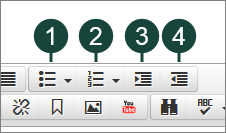
- Bulleted List: Creates an unordered list.
- Numbered List: Creates an ordered list.
- Increase Indent: Increases the indentation of lists or text.
- Decrease Indent: Decreases the indentation of lists or text.
Accessibility Quick Tip: It is recommended that groups of similar information be formatted using the bulleted or numbered list features whenever possible as this allows assistive technologies to recognize list structure.
Text Formatting:
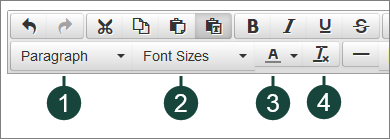
- Headings/Paragraph
Changes the text to the selected Heading Level. Formatting for each Heading Level is determined by the site design. Common usages include:- Body Text: Paragraph
- Page Title: Heading 1 (Automatic)
- Content Type Title: Heading 2 (Automatic)
- Sub-Titles: Heading 3 (Determined by User)
Accessibility Quick Tip: Heading Levels should be nested in a similar manner as the levels of an outline. It is highly recommended that you use the Heading Levels available in the drop-down menu as opposed to using text styles like Bold or Color as assistive technologies will not recognize text styles as Headings.
- Font Size
Changes the text to the size selected in the drop-down menu.
Accessibility Quick Tip: It is not recommended that you change text size unless absolutely necessary as this may affect how text is able to be resized on a device. - Text Color
Changes the text to the color selected. Pre-determined color options are available as well as the ability to select a custom color option.
Accessibility Quick Tip: All text color needs to have a strong contrast against the page background in order to be accessible. - Clear Formatting
Removes ALL formatting from the selected text including bold, italic, and underline.
NOTE: This option is ideal for text pasted from another program which may transfer undesirable colors, sizes, fonts, etc. All text styles, such as bold or italic, should be added only AFTER using this tool.
Tables and Characters
Horizontal Line and Special Characters
- Horizontal Line: Creates a horizontal line in the text.
- Special Characters: Opens a menu allowing you to select from the available special characters such as a letter with an accent or a copyright symbol.
Tables
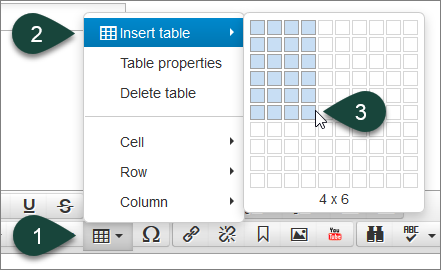
Creates a data table with the number of columns and rows selected.
Accessibility Quick Tip: Tables should be used for displaying data only. Tables should never be used for page layout purposes.
To enter a data table using the WYSIWYG Editor:
- Select the Table Icon from the toolbar.
- Select Insert Table.
- Using the Grid, select the number of Columns and Rows.
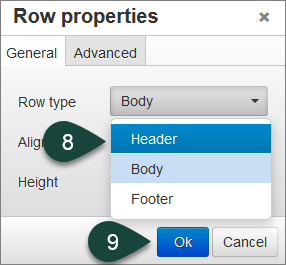
- Highlight the Header Row of the Table.
- Select the Table Icon from the toolbar.
- Select Row.
- Select Row Properties.
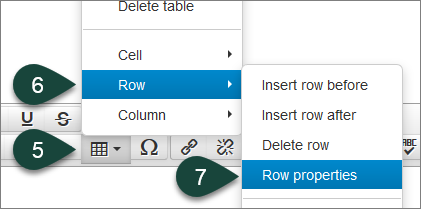
- Select Header from the Row Type drop-down menu.
- Select Ok.
- Enter content into the appropriate cells.
Links and Multimedia: Create/Edit Link
Creates a link to a URL or a document uploaded to the CMS.
Accessibility Quick Tip: All links should have descriptive link text such as “Michigan State University” to link to the MSU home page.
Accessibility Quick Tip: Avoid using language such as “Click Here” or references to shape, size, or position as these may change in a responsive website or for someone using an assistive technology.
To create a link to a document using the WYSIWYG Editor:
- Highlight the descriptive text you would like to make into a link.
- Select the Link Icon from the toolbar.
- Select the Search Folder icon.
NOTE: If you are linking to a website, paste the URL into the URL box and select Ok.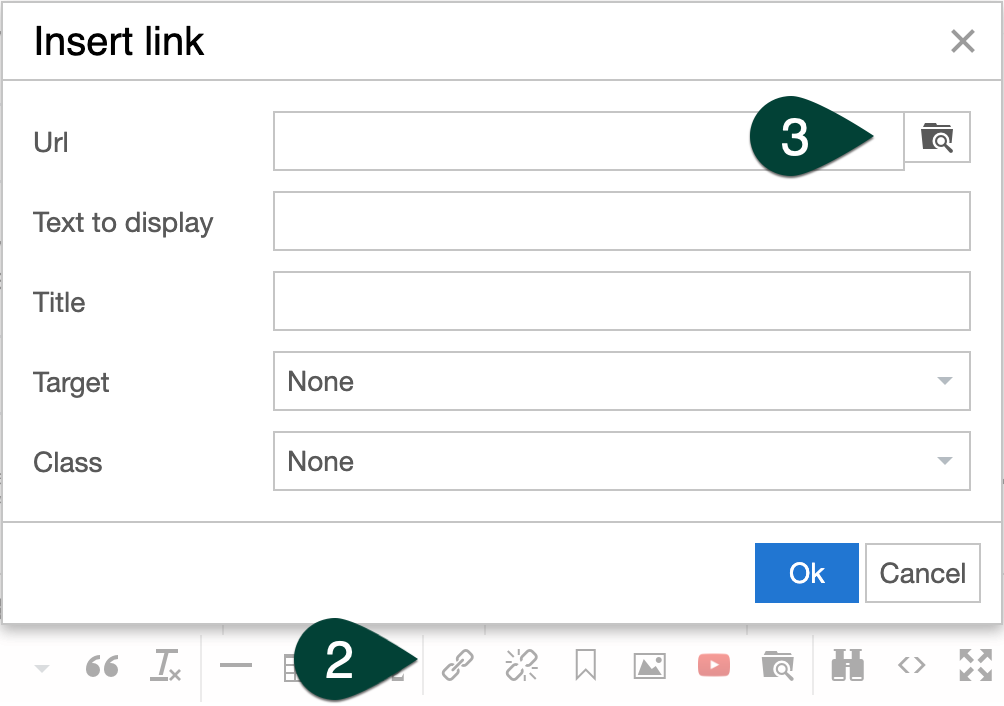
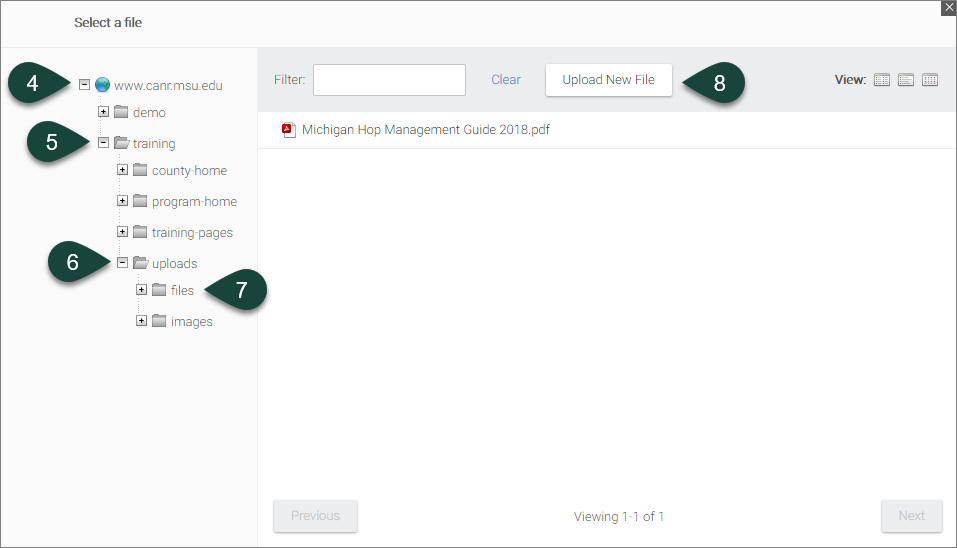
- Select the Plus Sign next to www.canr.msu.edu.
- Select the Plus Sign next to the name of the site you are working in.
- Select the Plus Sign next to the Uploads Folder.
- Select the Files Folder within the Uploads Folder.
- Select the Upload New File button.
- Click the Select file(s) to Upload button.
- Navigate to the file and select it.
- Select Save and Publish.
NOTE: It is important to ALWAYS select Save and Publish. If you only select Save, you will have a broken link.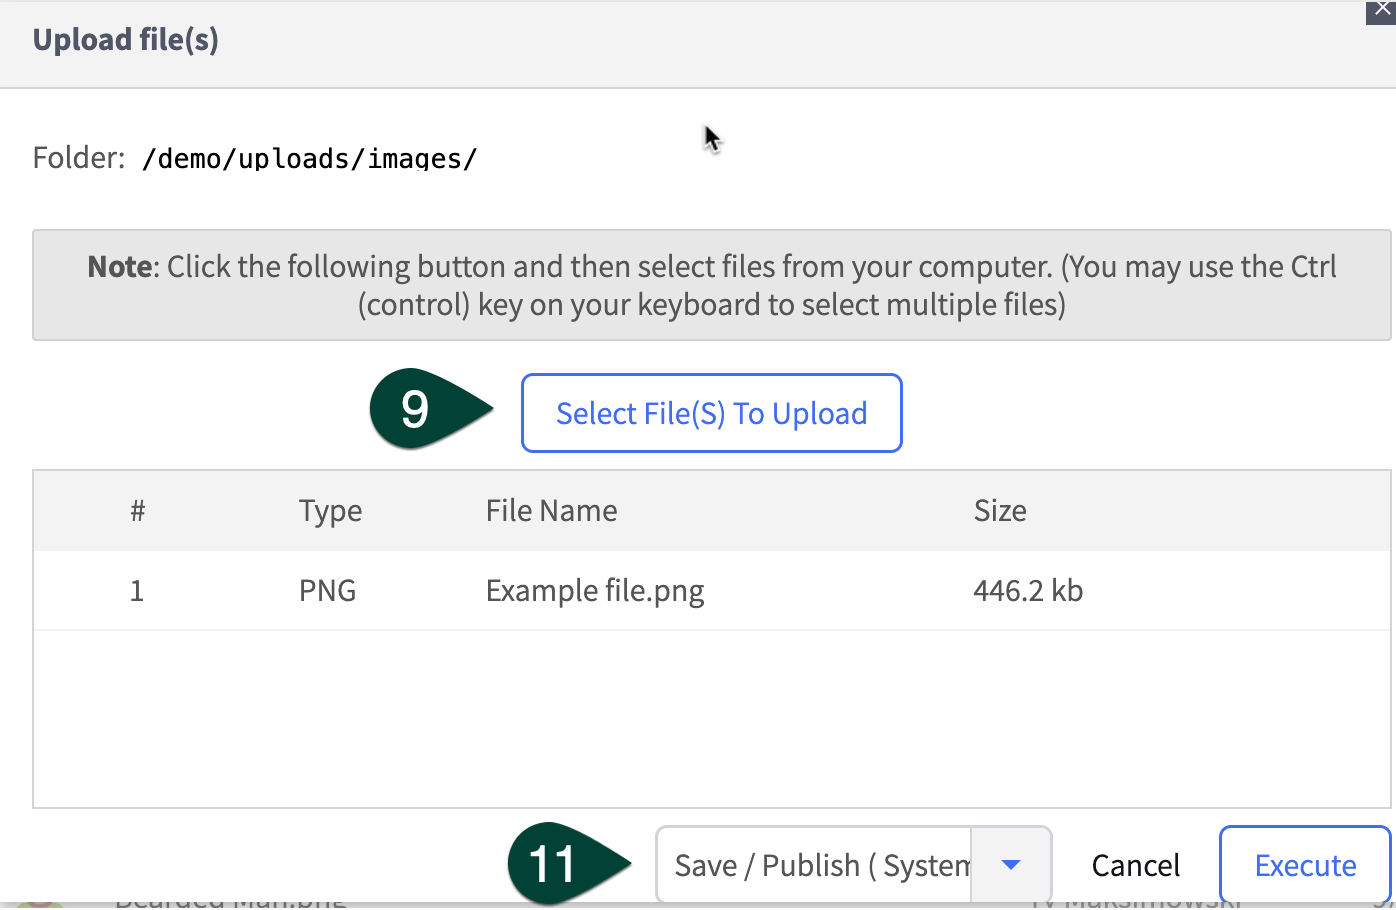
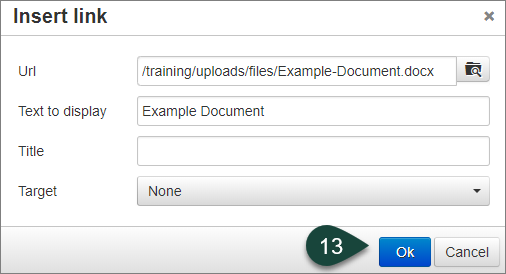
- Select the File Name you uploaded.
NOTE: It is recommended that you DO NOT use the “open in new window” option from the Target drop-down menu as this is not accessible. - Select Ok.
Links and Multimedia: Remove Link
 Removes the link to a URL or document leaving only the text.
Links and Multimedia: Anchor Link
Creates a link to a specified place within an existing page on your website.
To create an anchor link using the WYSIWYG Editor:
- Place your Cursor at the beginning of a line of text you wish to link to.
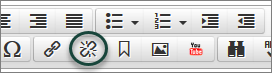
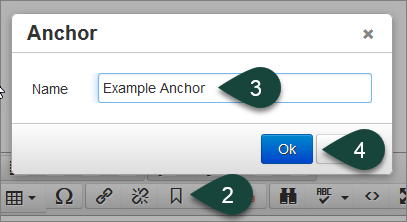
- Select the Anchor Link Icon from the toolbar.
- Enter a Unique Title for the anchor.
- Select Ok.
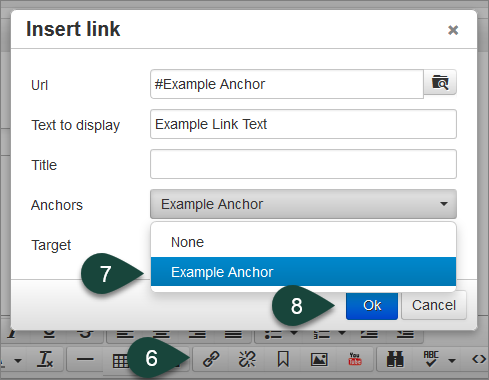
- Highlight the text you wish to link to the anchor.
- Select the Link Icon.
- Select the Anchor Title from the Anchor drop-down menu.
- Select Ok.
Links and Multimedia: Insert Image
Inserts an uploaded image into the text within the WYSIWYG Editor.
Accessibility Quick Tip: Images of text are generally not considered accessible unless the image is a logo. If you cannot remove the text from the image, it is recommended that you include the text from the image in the body text as well.
To insert an image using the WYSIWYG Editor:
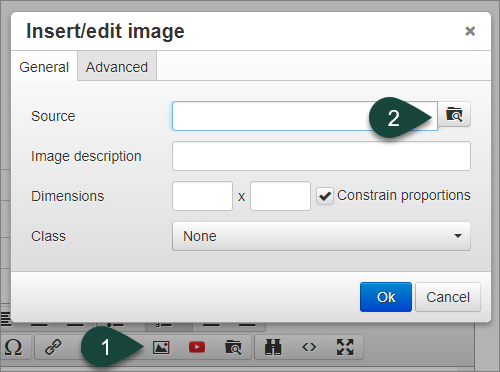
- Select the Insert Image icon from the toolbar.
NOTE: It is recommended that images are placed on a separate line rather than next to text as this may affect how content displays on mobile devices. - Select the Search Folder icon.
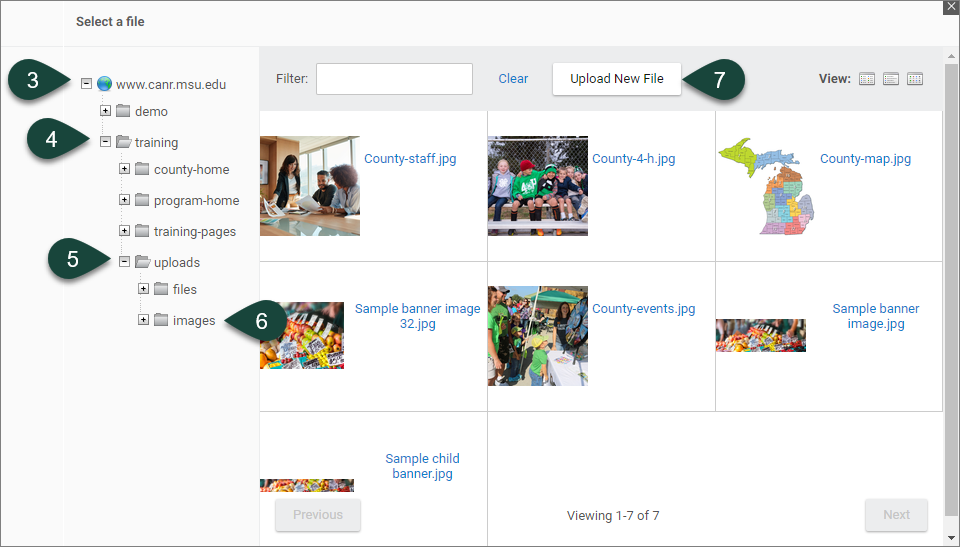
- Select the Plus Sign next to www.canr.msu.edu.
- Select the Plus Sign next to the name of the site you are working in.
- Select the Plus Sign next to the Uploads Folder.
- Select the Images Folder within the Uploads Folder.
- Select the Upload New File button.
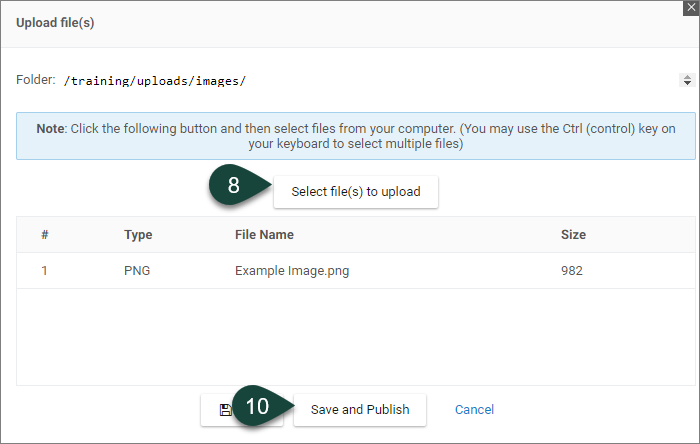
- Click the Select file(s) to Upload button.
- Navigate to the file and select it.
- Select Save and Publish.
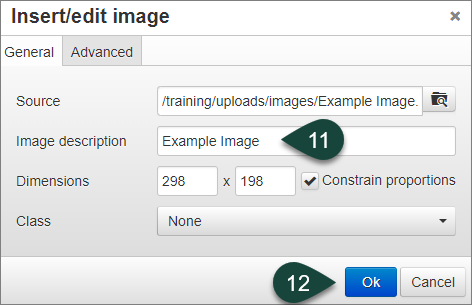
- Select the Image you uploaded.
- Enter a Short Text Description of the image in the Image Description field.
Accessibility Quick Tip: The Image Description field must be completed for all images within the WYSIWYG Editor. You do not need to include “Image of” as the assistive technology will notify the user that the content is an image. - Select Ok.
Links and Multimedia: Insert YouTube Video
Inserts a YouTube video into the text within the WYSIWYG Editor.
Accessibility Quick Tip: A text alternative is required for all multimedia content such as a transcript for audio content or closed captioning for video content.
NOTE: This only works for videos on YouTube. If your video is on another platform (Vimeo, MediaSpace, etc.) you will need to use the Source Code icon to page the embed code for the video into the correct location in the HTML code.
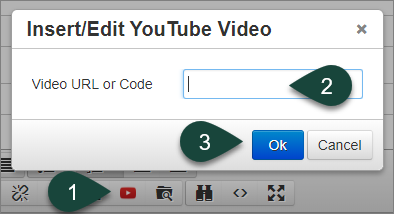
To insert a YouTube video using the WYSIWYG Editor:
- Select the YouTube icon from the toolbar.
- Paste the URL or Embed Code of the YouTube video into the text box.
- Select Ok.
Resource Commands
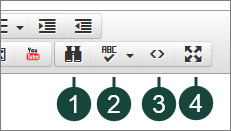
- Find/Replace: Finds and/or replaces text entered into the search box.
- Spell Check: Checks for misspelled words within the entered text.
- Source Code: Opens a window with the HTML code for the content entered.
- Full Screen: Makes the WYSIWYG Editor take up the full window of the browser.
