


How to create a Person Listing Widget in dotCMS
 Print
Print Email
EmailLearn how to create a Person Listing Widget in dotCMS.
- Log into dotCMS.
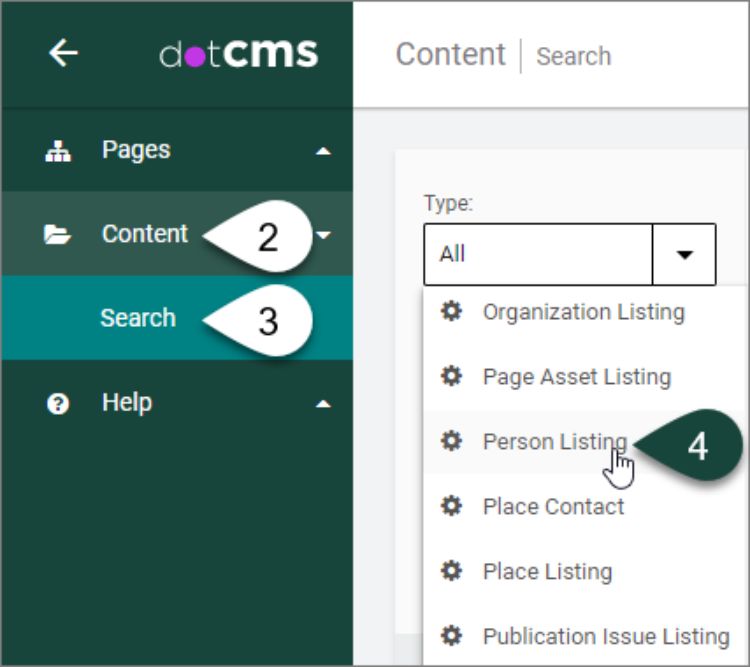
- Select Content on the left side of the screen.
- Select Search.
Content Dashboard
- Select Person Listing from the Type drop-down menu.
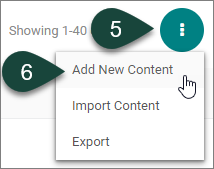
- Select the Triple Vertical Dots button in the upper right-hand corner of the page.
- Select Add New Content.
Person Listing Content Tab
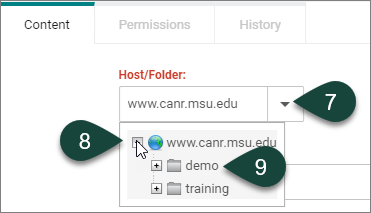
- REQUIRED FIELD: Open the Host/Folder drop-down menu.
- Select the Plus Sign (+) to twirl open the www.canr.msu.edu folder.
- Select the Folder of the site you where you want to save your person listing widget.
TIP: If you forget to select your folder for the Host/Folder, then when you attempt to publish the person listing widget you will receive an error stating that “You don't have the required permissions to save the asset. User has no Add Children Permissions on selected host.” Follow the steps above and republish your person listing widget. It should publish properly this time.
- REQUIRED FIELD: Enter the Widget Title of the person listing.
NOTE: This title is for back-end searching only.
NOTE 2: Above most fields in the Content tab is Hint Text that may help you to use the field more successfully. It is recommended to read this information prior to filling in a particular field.
- OPTIONAL: Fill in a Widget Headline to appear on the page above the person listing widget.
TIP: Most often, this is used for person listing widgets appearing on a web page that is not the directory main page, but instead as part of content on a page.
NOTE: When creating a web page that will become a website directory, skip this field as the Page Title becomes the Widget Headline.

- OPTIONAL: If a Widget Headline was input (Step 11), select the corresponding Headline Type style number from the drop-down between one (1) and six (6).
TIP: Most often, the Headline 3 style is selected, as the Headline 1 style is strictly used for the name of the website and the Headline 2 style is used for Page Titles.

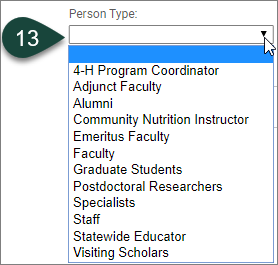
- OPTIONAL: Select the Person Type from the drop-down menu.
TIP: Most often, this is used on websites that include more than one person listing widget.
NOTE: If Person Type is selected, then any person profiles to be displayed in this person listing widget will need to have the corresponding Person Type category identified within the profiles.
- OPTIONAL: Select the Tags for the person profiles that you want to appear within this person listing widget.
NOTE: If Tags are selected, then any person profiles to be displayed in this person listing widget will need to have the corresponding tag(s) identified within the profiles.

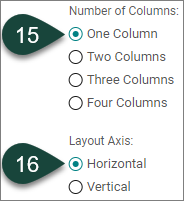
- OPTIONAL: Select the Number of Columns for the person listing widget.
TIP: Most often, Two Columns is selected for use within a main directory web page.
NOTE: The default selection is One Column.
- OPTIONAL: Select the Layout Axis for the person listing widget as Horizontal or Vertical.
TIP: Most often, Horizontal is selected, but both types can be used depending on the how the person listing widget is intended to display on a web page.
NOTE: The default selection is Horizontal.
NOTE 2: Horizontal orientation will show the contact information to the right of the photo. Vertical orientation will show the contact information below the photo.
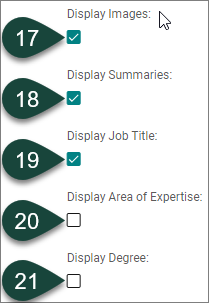
- OPTIONAL: Keep the Display Images field check box selected if person profile images should appear within the person listing widget.
NOTE: This is a default selection for person listing widgets.
- OPTIONAL: Keep the Display Summaries field check box selected if the person profile summary fields should appear within the person listing widget. Summary fields include job title, telephone and email.
NOTE: This is a default selection for person listing widgets.
- OPTIONAL: Keep the Display Job Title field check box selected if the person profile job title field should appear within the person listing widget.
NOTE: This is a default selection for person listing widgets.
NOTE 2: The Display Summaries field check box will also need to remain selected to show the job title field.
- OPTIONAL: Select the Display Area of Expertise field check box if the person profile area of expertise field should appear within the person listing widget.
NOTE: This is not a default selection for person listing widgets.
NOTE 2: If selected, the Display Summaries field check box will also need to remain selected to show the Display Area of Expertise field.
- OPTIONAL: Select the Display Degree field check box if the person profile degree field should appear within the person listing widget.
NOTE: This is not a default selection for person listing widgets.
NOTE 2: If selected, the Display Summaries field check box will also need to remain selected to show the Display Degree field.
Person Listing Widget Relationship Filters
- Select the related Works For Organization folder from the drop-down menu.
TIP: This is one of the most commonly used relationship filters for the creation of a main directory web page.
NOTE: If the Works For relationship is selected, then any person profiles to be displayed in this person listing widget will need to have the corresponding relationship selected within the profiles.
- Select the related Member Of Organization folder from the drop-down menu.
TIP: This relationship type is typically used for the creation of committee or student organization directory web pages.
NOTE: If the Member Of relationship is selected, then any person profiles to be displayed in this person listing widget will need to have the corresponding relationship selected within the profiles.
- Select the related Work Location Place relationship from the drop-down menu.
NOTE: This relationship type is typically used for websites that designate location(s) as a Place relationship in the relationships tab for person profiles. These websites often have a web page showing their locations using a Place Listing Widget.
NOTE 2: If the Work Location relationships is selected, then any person profiles to be displayed in this person listing widget will need to have the corresponding relationship selected within the profiles.
- Select the related Dataset folder from the drop-down menu.
TIP: This is another commonly used relationship type field for the creation of a main directory web page.
NOTE: If the Dataset relationship is selected, then any person profiles to be displayed in this person listing widget will need to have the corresponding relationship selected within the profiles.
- Select the related Series relationship from the drop-down menu.
NOTE: If the Series relationships is selected, then any person profiles to be displayed in this person listing widget will need to have the corresponding relationship selected within the profiles.

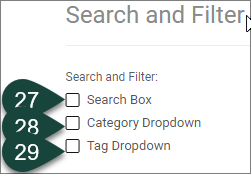
Person Listing Widget Search and Filter
- OPTIONAL: Select the Search Box field check box. If selected, this field will display at the top of the person listing widget to allow visitors the option to type in search criteria.
- OPTIONAL: Select the Category Dropdown field check box. If selected, a Category drop-down menu will display at the top of the person listing widget to allow visitors the option to filter the results by person profile categories.
- OPTIONAL: Select the Tag Dropdown field check box. If selected, a Tags drop-down menu will display at the top of the person listing widget to allow visitors the option to filter the results by tag(s).
Person Listing Widget Person Listing Index
- OPTIONAL: Insert the Person Homepage URL or web address for the directory main page.
TIP: Most often, this is used for person listing widgets that appear on a home page to direct visitors to the main directory web page on the website.

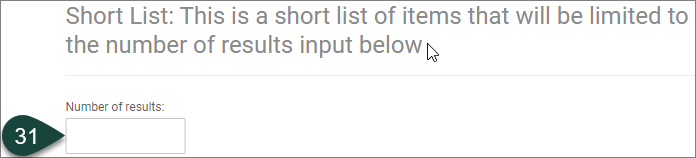
Person Listing Widget Person Short List
- OPTIONAL: Insert a number limit on the Number of Results to show within the widget, e.g., insert 10 to show only 10 profiles within the listing widget.
NOTE: This is a sort list of items that will be limited to the number of results input for this field.
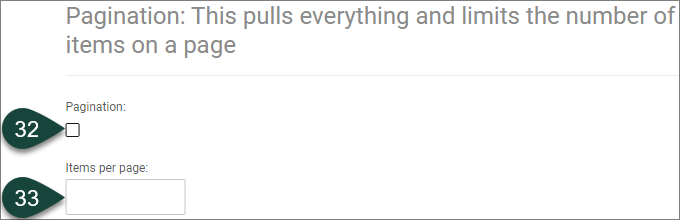
Person Listing Widget Person Pagination
- OPTIONAL: Select the Pagination field check box. If selected, it will allow for the widget to paginate results on the website.
- OPTIONAL: Insert a number limit on Items per page, i.e., person profiles, to show on the web page, e.g., insert 10 to show only 10 profiles on a single web page.
NOTE: This pulls everything from the widget and limits the number of items that show on a single page.
Person Listing Widget Final Steps
- OPTIONAL: Select the Language for your person listing widget. The English (US) language is the default. Other options include Espanol, French and Arabic. To choose another language other than English, select the drop-down menu and choose the appropriate language.
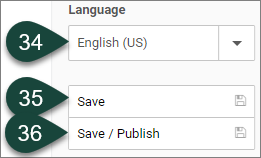
- OPTIONAL: Select the Save button to save your person listing widget to the back-end of dotCMS. This will allow you to still work on it before publishing it live.
- OPTIONAL: Select the Save/Publish button to publish your person listing widget so it will appear live on your website.
