


How to move an event online in dotCMS due to novel coronavirus
 Print
Print Email
EmailLearn how to move an event online in dotCMS due to novel coronavirus.
- Log into dotCMS.
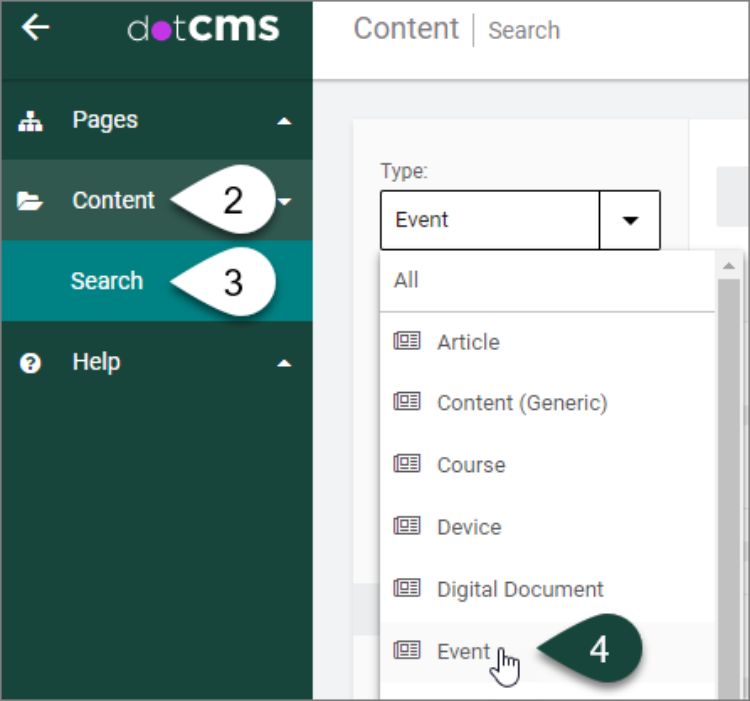
- Select Content on the left side of the screen.
- Select Search.
Content Dashboard
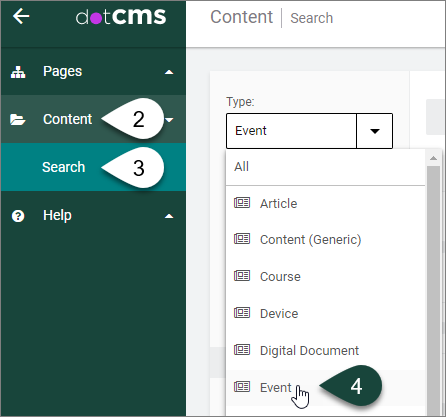
- Select Event from the Type drop-down menu.
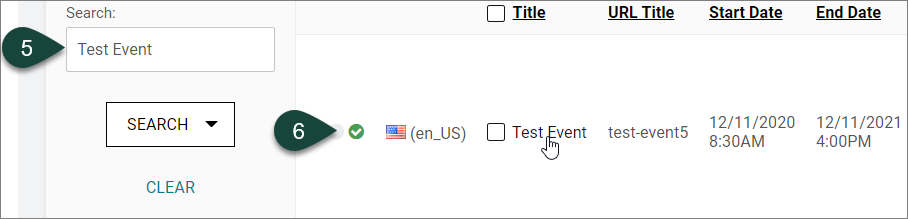
- In the Search field, type in the Title of the Event to edit.
- Select the Event Title from the list of results.
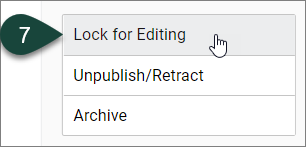
Event Publishing Buttons
- Select the Lock for Editing button. This enables locking the event for editing so only you have access to it.
Event Content Tab
- REQUIRED FIELD: Insert “MOVED ONLINE:” text at the beginning of the event Title field.
NOTE: Example, “MOVED ONLINE: Test Event.”

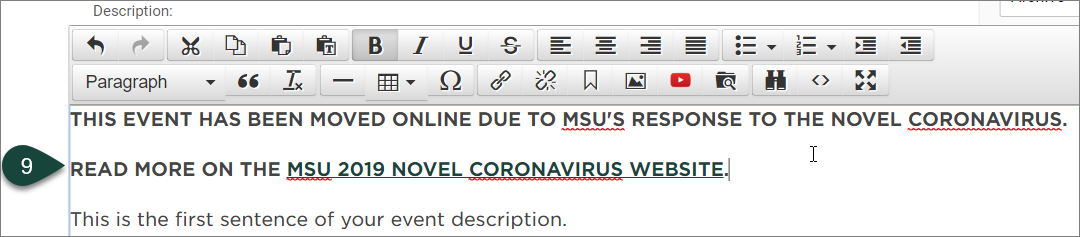
- REQUIRED: Use the WYSIWYG Editor (Description field) to insert text related to the event cancelation.
“THIS EVENT HAS BEEN MOVED ONLINE DUE TO MSU'S RESPONSE TO THE NOVEL CORONAVIRUS.
READ MORE ON THE MSU TOGETHER WE WILL WEBSITE.”
NOTE: The “MSU TOGETHER WE WILL WEBSITE” text should be linked to: https://msu.edu/together-we-will/.
- OPTIONAL: If you know how to input HTML code via the Source Code (<>) button in the WYSIWYG Editor, then you can skip Step 9 and instead insert the below code at the beginning of the code field.
<p><strong>THIS EVENT HAS BEEN MOVED ONLINE DUE TO MSU'S RESPONSE TO THE NOVEL CORONAVIRUS.</strong></p>
<p><strong>READ MORE ON THE <a title="MSU TOGETHER WE WILL WEBSITE" href="https://msu.edu/together-we-will/">MSU TOGETHER WE WILL WEBSITE</a>.<br /></strong></p>
- OPTIONAL: If you input Source Code in Step 10, then select the OK button to close the window.

Event Tags Tab
- Select the Tags Tab at the top of the screen. This tab enables you to create and select tags specific to your event.
NOTE: When your event is Published, the tags will appear at the bottom of the Event page and will be clickable. If you select one of these tags a web page will open that displays all content related to that specific tag from across all the college’s websites.

- Put your cursor in the Tags field and type the tags called “coronavirus” and “novel coronavirus.”
- Select the pre-set tags that appear.

- Your tag will now appear in the Tags field.

Event Final Steps
- If you select the Check Links button, it will enable you to check the links in the event posting to make sure they work.
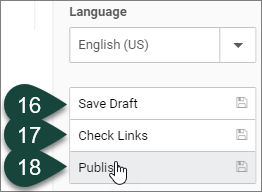
- If you select the Save Draft button, it will save the event to the backend of dotCMS so you can still work on it before publishing it live.
- If you select the Publish button, it will publish the event so the changes will appear live on your site.
