


Record a Local Zoom Meeting
- Login to Zoom (https://msu.zoom.us/) or open the Zoom app. Start a Zoom meeting by selecting the Schedule a New Meeting button in the web application or by selecting New Meeting in the Zoom app.
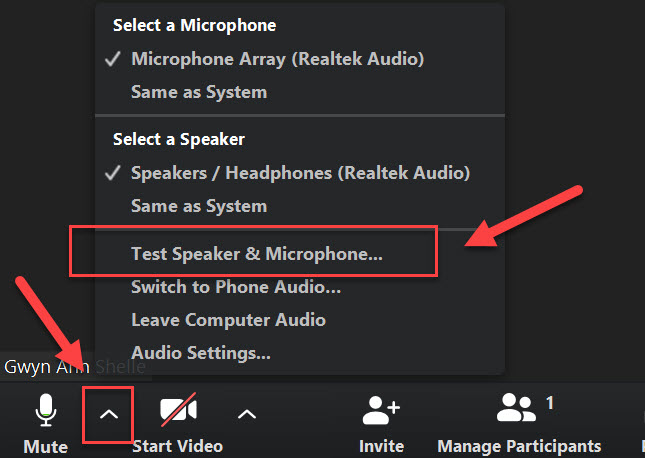
- Check your audio settings by selecting the carrot (up arrow) to the right of the microphone icon. Select Test Speaker and Microphone, and follow the prompts, to test your audio.
If you are going to record your video (the video of the speaker), select the video icon. Please note that recording a video of a speaker increases the size of the recorded file. For Zoom system requirements visit: Zoom System Requirements.
- If you are sharing a PowerPoint or website select the Share Screen button. Select Screen to share any application on your computer or select a specific application from your preview list. If you are going to be playing a video check the box for Share Computer Sound.
- Select the Record button. You will know that you are recording as you will see a stop/pause option and will see a red indicator light in the top-left corner of the screen.
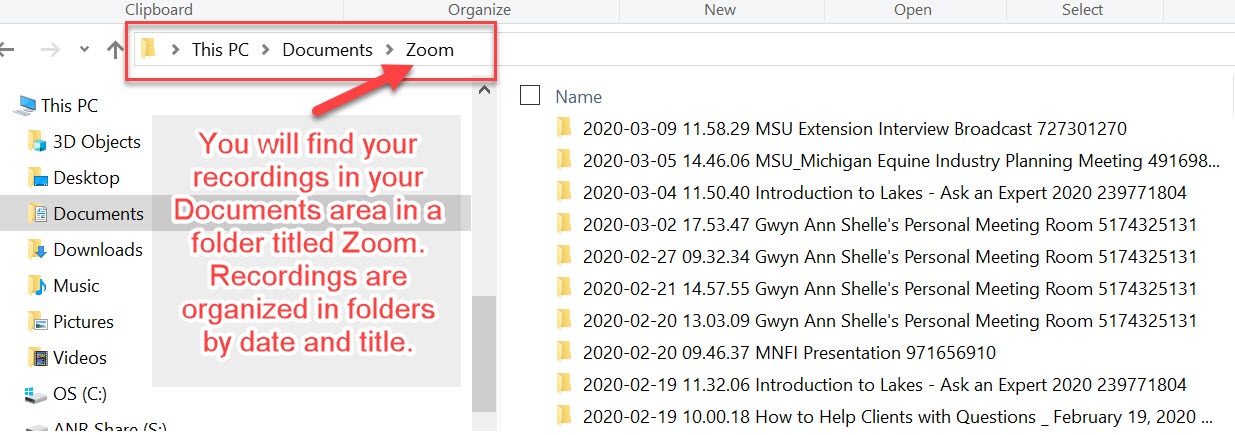
- Once the meeting has ended, Zoom will convert the recording, and the file will be saved locally on your computer in a folder tilted “Zoom.” Zoom automatically creates this folder when you record a Zoom meeting or webinar. A sample is shown below.
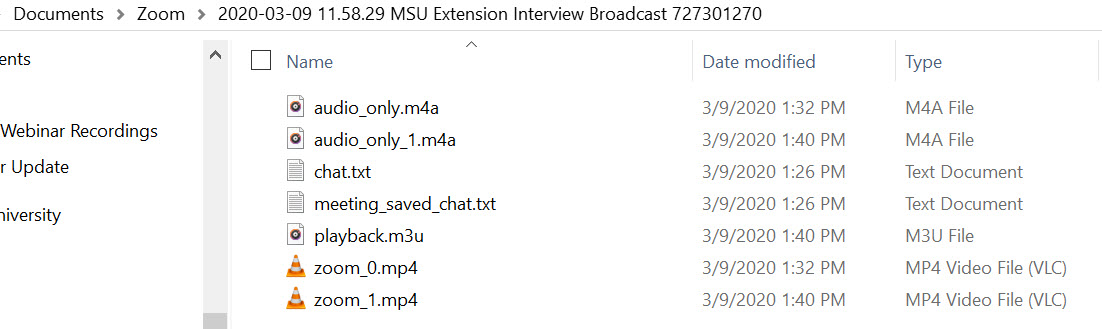
In your Zoom folder you may see several files including an audio only file, a text file with the chat history, and at least one .mp4 file. If you see multiple .mp4 files it is because the meeting was started and stopped more than once.
Upload the recording to MSU MediaSpace as shown in this guide: Sharing and Trimming Videos in MediaSpace.
 Print
Print Email
Email