Blanching and Freezing Foods
DOWNLOADAugust 9, 2023 - Joyce McGarry, Lisa Treiber, and Laurie Messing, Michigan State University Extension
This Document is offered in: English Arabic, Espanol,
Freezing 
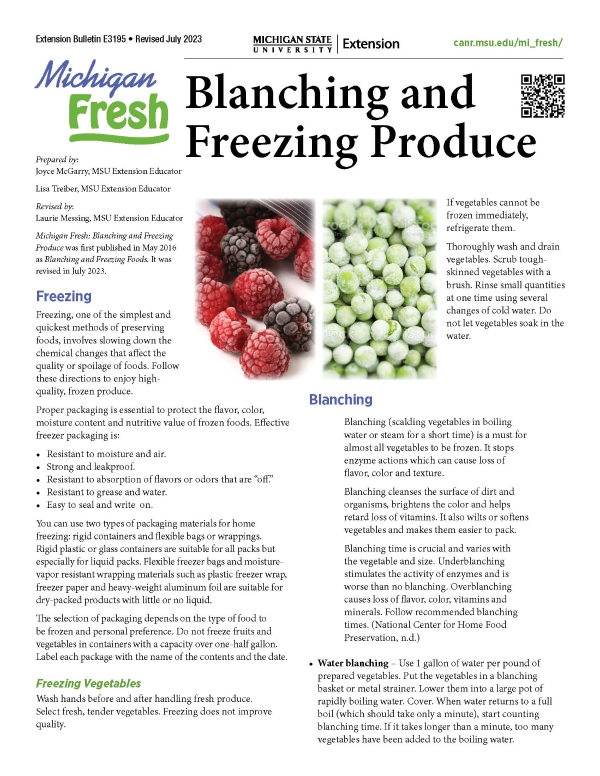
Freezing, one of the simplest and quickest methods of preserving foods, involves slowing down the chemical changes that affect the quality or spoilage of foods. Follow these directions to enjoy high- quality, frozen produce.
Proper packaging is essential to protect the flavor, color, moisture content and nutritive value of frozen foods. Effective freezer packaging is:
- Resistant to moisture and air.
- Strong and leakproof.
- Resistant to absorption of flavors or odors that are “off.”
- Resistant to grease and water.
- Easy to seal and write on.
You can use two types of packaging materials for home freezing: rigid containers and flexible bags or wrappings. Rigid plastic or glass containers are suitable for all packs but especially for liquid packs. Flexible freezer bags and moisture-vapor resistant wrapping materials such as plastic freezer wrap, freezer paper and heavy-weight aluminum foil are suitable for dry-packed products with little or no liquid.
The selection of packaging depends on the type of food to be frozen and personal preference. Do not freeze fruits and vegetables in containers with a capacity over one-half gallon. Label each package with the name of the contents and the date.
Freezing Vegetables 
Wash hands before and after handling fresh produce. Select fresh, tender vegetables. Freezing does not improve quality.
If vegetables cannot be frozen immediately, refrigerate them.
Thoroughly wash and drain vegetables. Scrub tough- skinned vegetables with a brush. Rinse small quantities at one time using several changes of cold water. Do not let vegetables soak in the water.
Blanching
Blanching (scalding vegetables in boiling water or steam for a short time) is a must for almost all vegetables to be frozen. It stops enzyme actions which can cause loss of flavor, color and texture.
Blanching cleanses the surface of dirt and organisms, brightens the color and helps retard loss of vitamins. It also wilts or softens vegetables and makes them easier to pack.
Blanching time is crucial and varies with the vegetable and size. Underblanching stimulates the activity of enzymes and is worse than no blanching. Overblanching causes loss of flavor, color, vitamins and minerals. Follow recommended blanching times. (National Center for Home Food Preservation, n.d.)
- Water blanching – Use 1 gallon of water per pound of prepared vegetables. Put the vegetables in a blanching basket or metal strainer. Lower them into a large pot of rapidly boiling Cover. When water returns to a full boil (which should take only a minute), start counting blanching time. If it takes longer than a minute, too many vegetables have been added to the boiling water.
- Steam blanching – Steam blanching takes about 1½ times longer than water blanching. To steam, use a pot with a tight lid and a basket that holds the food at least 3 inches above the bottom of the pot. Put 1 to 2 inches of water in the pot. Bring to a boil. Place vegetables in a single layer, cover and keep on high heat. Start counting steaming time as soon as the lid is on.
Cooling – As soon as blanching is complete, vegetables should be cooled quickly to stop the cooking process. To cool, plunge the vegetables immediately into ice water. Change water frequently. Cooling vegetables should take the same amount of time as blanching.
Drain vegetables thoroughly after cooling. Extra moisture can cause a loss of quality when vegetables are frozen.
Pack vegetables into containers or freezer bags, removing as much air as possible. Leave ½- to 1½-inch headspace depending on container type. Seal, label, date and freeze.
A few vegetables – such as raw tomatoes, fresh herbs, green onions, white onions and peppers – do not require blanching before freezing.
Blanching Times
|
Vegetable |
In boiling water (minutes) |
In steam (minutes) |
|
Artichoke – globe (hearts) |
7 |
- |
|
Artichoke – Jerusalem |
3–5 |
- |
|
Asparagus |
|
|
|
Small stalk |
2 |
3 |
|
Medium stalk |
3 |
5 |
|
Large stalk |
4 |
6 |
|
Beans – snap, green or wax |
3 |
5 |
|
Beans – lima, butter or pinto |
|
|
|
Small |
2 |
3 |
|
Medium |
3 |
5 |
|
Large |
4 |
6 |
|
Broccoli (flowerets 1½ inches across) |
3 |
5 |
|
Brussels sprouts |
|
|
|
Small heads |
3 |
5 |
|
Medium heads |
4 |
6 |
|
Large heads |
5 |
7 |
|
Cabbage or Chinese cabbage (shredded) |
1½ |
2½ |
|
Carrots |
|
|
|
Small |
5 |
8 |
|
Diced, sliced or lengthwise strips |
2 |
3 |
|
Cauliflower (flowerets, 1 inch across) |
3 |
5 |
|
Celery |
3 |
- |
|
Corn |
|
|
|
Corn on the cob |
|
|
|
Small ears |
7 |
10 |
|
Medium ears |
9 |
13 |
|
Large ears |
11 |
16 |
|
Whole-kernel or cream-style (blanch ears before cutting corn from cob) |
4 |
6 |
|
Eggplant |
4 |
6 |
|
Greens |
|
|
|
Collards |
3 |
5 |
|
All others |
2 |
3 |
|
Kohlrabi |
|
|
|
Whole |
3 |
- |
|
Cubes |
1 |
- |
|
Mushrooms |
|
|
|
Whole |
- |
9 |
|
Buttons or quarters |
- |
9 |
|
Slices |
- |
5 |
|
Okra |
|
|
|
Small pods |
3 |
5 |
|
Large pods |
5 |
8 |
|
Peas – edible pods |
2–3 |
4–5 |
|
Peas – field (black-eyed) |
2 |
- |
|
Peas – green |
1½ – 2½ |
3–5 |
|
Peppers – halves |
3 |
5 |
|
Potatoes – Irish (new) |
3–5 |
5–8 |
|
Pumpkin |
Cook |
- |
|
Rutabaga |
3 |
5 |
|
Soybeans – green |
5 |
- |
|
Squash – chayote |
2 |
- |
|
Squash – summer |
3 |
5 |
|
Squash – winter |
Cook |
- |
|
Sweet potatoes |
Cook |
- |
|
Turnips or parsnips |
|
|
|
Cubes |
3 |
5 |
Blanching Times table was adapted in part from the National Center for Home Food Preservation (NCHFP), Freezing: Blanching Times¸ (https:// nchfp.uga.edu/how/freeze/blanching.html) The NCHFP extracted it from So Easy to Preserve by E. Andress and J. A. Harrison, J (2014). (Bulletin 989). (6th ed.). University of Georgia Cooperative Extension. It was also adapted in part from the University of Minnesota Extension, Vegetable Blanching Directions and Times for Home Freezer Storage: Vegetable Blanching Times (Water Blanching), Reviewed 2020. (https://extension.umn. edu/preserving-and-preparing/vegetable-blanching-directions-and-times-home-freezer-storage)
Freezing Fruits
- Wash hands before and after handling fresh produce.
- Select fresh, firm-ripe Freezing does not improve quality.
- If fruits cannot be frozen immediately, refrigerate them.
- Wash under cool running You can scrub tough- skinned fruits with a brush. Rinse small quantities at one time using several changes of cold water. Do not let fruit soak in the water.
- Do not use galvanized, copper or iron equipment when preparing fruit. The acid in the fruit can react with the metals and contaminate the food.
Types of Packs
- Syrup pack – The type of syrup depends on the sweetness of the fruit to be frozen. Make lighter syrups for mild-flavored fruits; heavier syrups for sour fruits. Fruits frozen in syrup have a better texture and flavor and hold their shape better when thawed than fruit frozen in water without sugar. You don’t need sugar to safely preserve fruit, however.
To make syrup, dissolve sugar in lukewarm water, mixing until the solution is clear. Chill syrup before using. Use just enough cold syrup to cover the prepared fruit after it’s placed in the freezer container – about ½ to ⅔ cup of syrup per pint. To keep fruit under the syrup, place a small piece of crumpled parchment paper or other water-resistant wrapping material on top, and press fruit down into the syrup before sealing the container.
- Sugar pack – Sprinkle sugar over the fruit and stir until sugar is dissolved. Use for sliced soft fruits such as peaches, strawberries, grapes, plums and cherries.
- Unsweetened – Pack fruit dry, covered with water containing ascorbic acid, or pack in unsweetened juice.
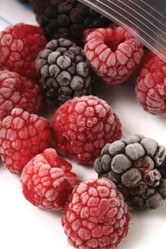
- Tray pack – This method is excellent for small whole fruits such as blueberries, raspberries and cranberries. Put the fruit in a single layer on a shallow tray, freeze and then package. The fruit pieces are loose, so you can take out small servings and reseal the package.
- Artificial sweetener pack – You may use sugar substitutes in any of the unsweetened packs mentioned previously. You can add before freezing or just before serving. Equivalents for a standard amount of sugar vary with each brand of artificial Use directions on the package to determine the amount of sweetener needed.
After following instructions for the type of pack you are using, leave ½- to 1½-inch headspace depending on the container type. Seal, label, date and freeze.
Syrups for Use in Freezing
|
Type of syrup |
Percent syrup* |
Cups of sugar** |
Cups of water |
Yield of syrup in cups |
|
Very light |
10 |
½ |
4 |
4½ cups |
|
Light |
20 |
1 |
4 |
4¾ cups |
|
Medium |
30 |
1¾ |
4 |
5 cups |
|
Heavy |
40 |
2¾ |
4 |
5⅓ cups |
|
Very heavy |
50 |
4 |
4 |
6 cups |
*Approximate
**In general, up to one-fourth of the sugar may be replaced by corn syrup or mild-flavored honey. A larger proportion of corn syrup may be used if a very bland, light-colored type is selected.
References
- Andress, E., & Harrison, J. A. (2014). So easy to preserve (Bulletin 989). (6th ed.). University of Georgia Cooperative Extension.
- National Center for Home Food Preservation. (n.d.). Freezing. https://nchfp.uga.edu/how/freeze/blanching.html
- U.S. Department of Agriculture. (2015). Complete guide to home canning (Rev. ed.). (Agriculture Information Bulletin No. 539). http://nchfp.uga.edu/publications/publications_ usda.html
- University of Minnesota Extension, (2020) Vegetable blanching directions and times for home freezer storage: Vegetable blanching times (water blanching). https:// extension.umn.edu/preserving-and-preparing/vegetable- blanching-directions-and-times-home-freezer-storage
More information


 Print
Print Email
Email


